 Click any image to enlarge
Webasto furnaces were originally designed to pre-heat the vehicle’s engine for optimal starting temperatures in the harsh northern hemisphere winters. Everything that is supplied in the kit is designed for this purpose, including the wiring harness, which is overly complicated for use in a camper’s hydronic heating system.
There are a couple of options when it comes to modifying the wiring harness for a hydronic system setup.
- only remove/disable the bare necessity
- remove everything that is not required
If you have been following along with my expedition camper build you should not be surprised to hear that I chose the second option.
I will cover both modifications, leaving it to you to decide which is best for your scenario.
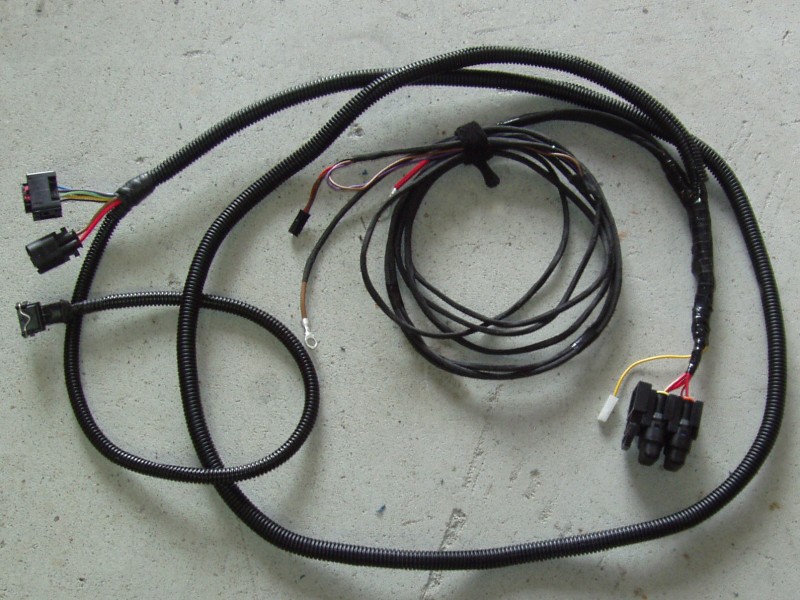
The harness is basically made up of the following:
- a red wire, fitted with a 6mm ring terminal (main power wire +12 volts)
- a brown wire, fitted with a 6mm ring terminal (main earth wire)
- an eight wire loom with two black modular plugs, for connecting to the Webasto furnace
- a two wire loom for powering the pump (blue and brown wires)
- a five wire loom with a small black plug, for connecting to the controller
- a two wire loom (red and black wires)
- a yellow wire, fitted with a white plastic plug (diagnostic wire)
- three fuse blocks.
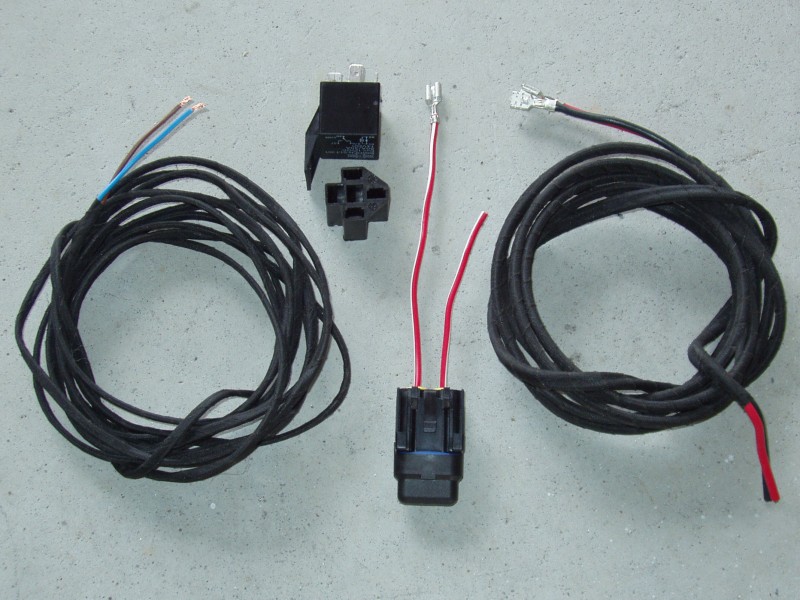
- a relay socket and relay
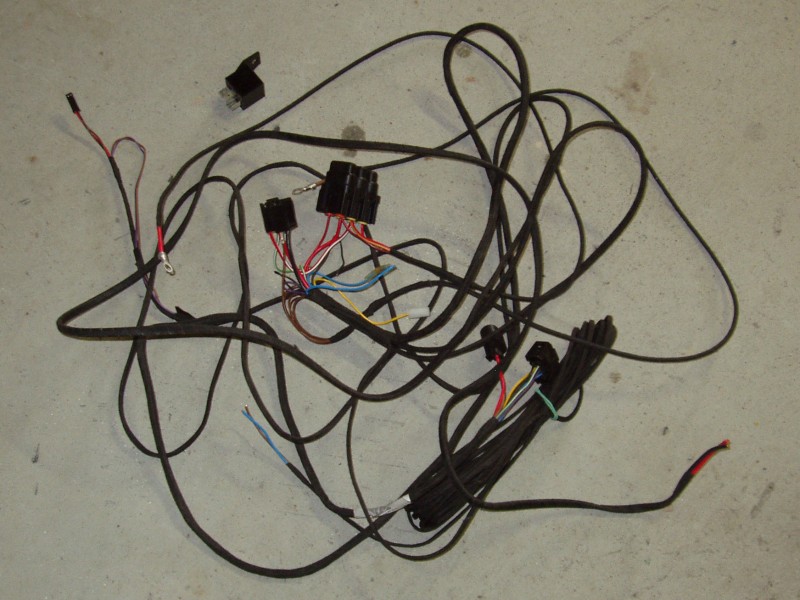
The wiring harness can look a little daunting when undone and laid out on the ground, but it’s really not that complicated. Personally, I think Webasto could have made this harness a little neater, but having said that, I have definitely seen worse. Webasto has used high quality plugs, which is definitely a good start.
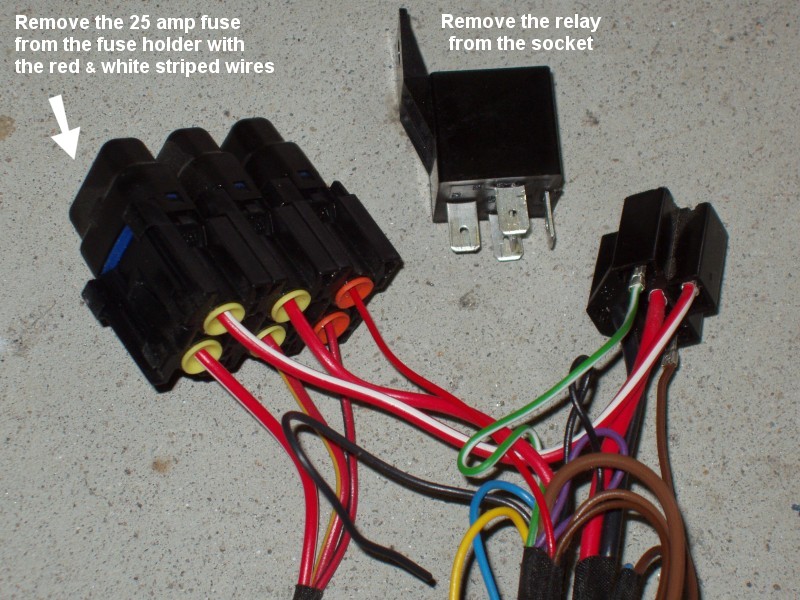
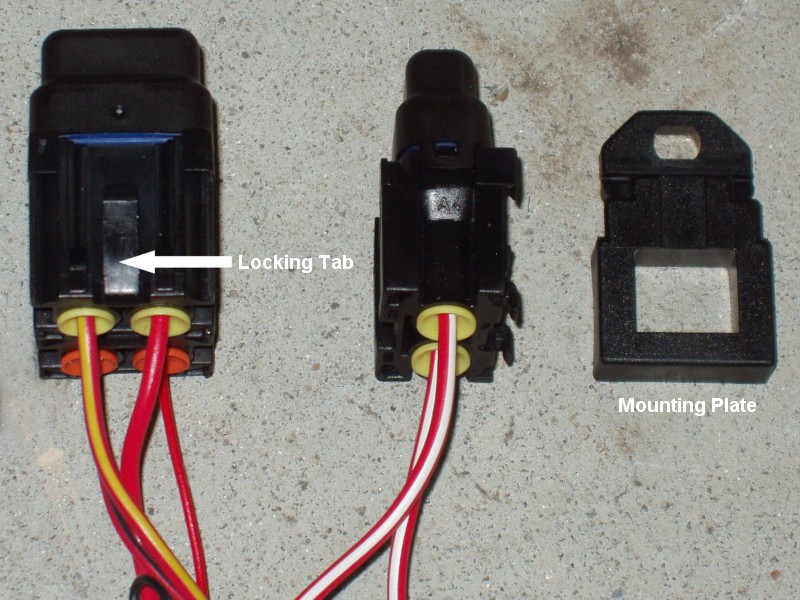
To configure the wiring harness for a hydronic system, all you really have to do is to remove the relay from the relay socket and remove the 25 amp fuse from the fuse holder that has the red and white striped wires.
At a minimum, I would also suggest removing the red and black wires from the relay socket, as these are not needed. To do this, use a small jeweller’s screwdriver and, taking care, push down the terminal’s securing tab inside the relay socket in order to release the terminals.
Because I see no purpose in keeping additional wiring in a loom if it is not required, I chose to strip the loom down to the bare essentials.
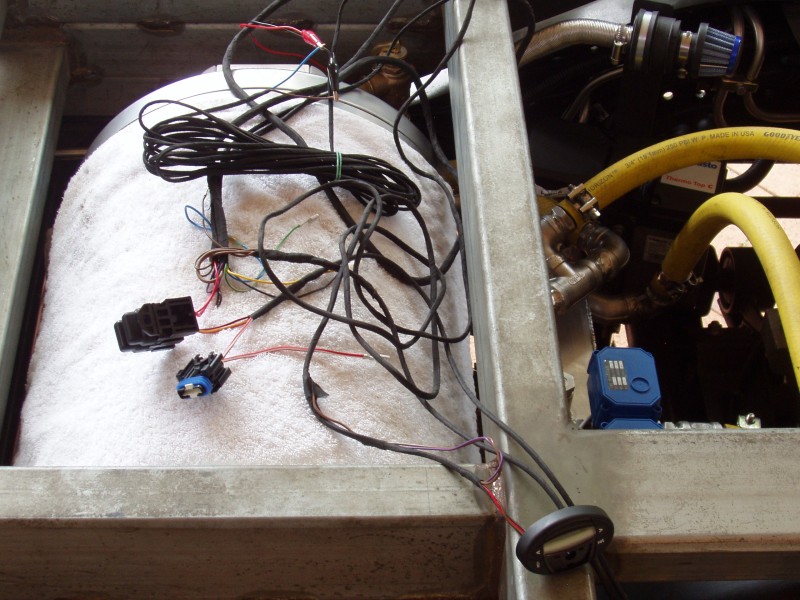
This involved connecting everything up and starting up the furnace. My intent was to shorten the power wires for the pump, so connecting the supplied plug would have been stupid. Instead, I used a couple of small alligator test leads to connect the pins in the pump socket to the blue and brown wires in the harness. The controller was plugged in, the two modular plugs were connected to the Webasto furnace and the red and brown wires were connected to the battery. After setting the controller, I pushed the flame button and the unit started to fire up. Just to make sure everything was working correctly, I left the unit running for about 45 minutes to ensure that it cycled as it should. With functionality confirmed, the loom was disconnected and removed from the truck.
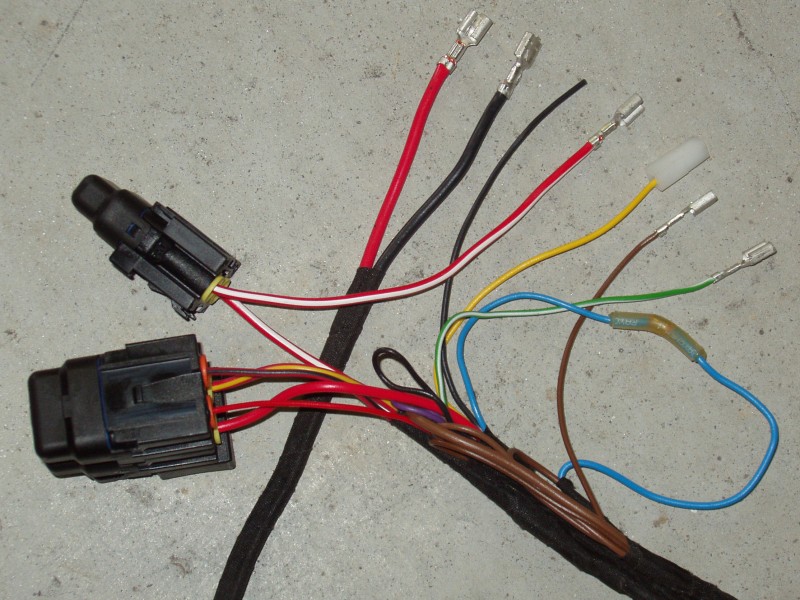
I had already removed all of the wires from the relay socket, so I cut off the terminals from the brown and green/white wires and put some heat shrink over the ends to avoid any possibility of shorting. The fuse blocks are modular, so it was easy to remove the fuse holder that was not going to be used. I unwrapped the insulation tape back to where the three power wires were joined. After doing this I cut the red/white wire and put heat shrink on it too. The insulation tape was then re-wrapped around the power cables.
The fuse blocks will ultimately be located inside the camper, along with the other electrical equipment, but for now I will mount them temporarily onto the side of the chassis, near the house batteries. I am leaving the harness connected so that I can run the Webasto furnace.
If you are running the Webasto furnace to heat a calorifier and also to heat the camper, there is another modification that you may want to do.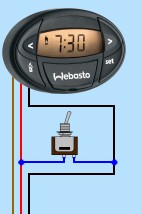
The timer for this unit only allows the furnace to run for a maximum of 60 minutes; 30 minutes by default.
If you are running radiator style heaters inside the camper, and the weather outside is particularly cold, 60 minutes of running time may not be sufficient.
One solution to this problem is to keep adjusting the timer, so it never gets to zero where it will automatically switch the furnace off. Although this solution will work, I am sure that I would quickly tire of constantly adjusting the timer.
Another option, and the one recommended by Webasto Australia, is to install an on/off switch between the red and black wires of the timer. Personally, I would suggest using a switch that has an indicator light.
Having a switch in this circuit allows the furnace to run continuously, but you need to be aware of how the system will operate if you have such a switch installed. Below I have detailed the various scenarios…
The switch is in the off position and the furnace is started with the flame button on the timer:
The furnace and timer will operate as designed.
The display will show 30 minutes when the flame button is pressed. This can be increased to 60 minutes by pressing the right arrow button.
When the timer counts down to zero, the furnace will automatically switch off.
The furnace was turned on using the flame button on the timer, then you turn the switch on:
The furnace will continue to run and when the timer reaches zero it will start to count up and the furnace will run indefinitely.
The furnace is turned on using the switch, not the flame button on the timer:
The furnace will start but nothing will be displayed in the timer window.
If the flame button is pressed, the flame icon and 30 minutes will be displayed in the timer window.
When the timer reaches zero it will start to count up and the furnace will run indefinitely.
Turning the furnace off:
If the switch is in the on position, turn it off.
If the timer window was blank previously (furnace started with the switch), it will now display the flame icon and 30 minutes.
Press the flame button.
After going through its normal shut down cycle, the furnace will turn off.