 Click any image to enlarge
I have not completely finished this system as yet but the tanks, pumps and the majority of the plumbing have all been installed. The plumbing and pumps were done a long time ago, but the tanks only went in recently.
My initial plan was to run a single water pump from a single water tank, so that is how I started out.
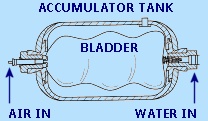
Having a background in hydraulics, I was not convinced that just using a pump was the best solution, despite being told that this is what everyone does these days. I chose to also include an accumulator into my system design. For anyone that does not know what an accumulator is, or what it does, let me explain.
In this scenario, an accumulator is a pressure storage vessel in which the water is held under pressure with the use of an air filled bladder. The accumulator keeps the system under constant pressure, like mains pressure in a house. The pump will run longer in a system fitted with an accumulator, but it will cycle less frequently, which is better for the pump. I can also fill a glass of water at 2am without the pump coming on.
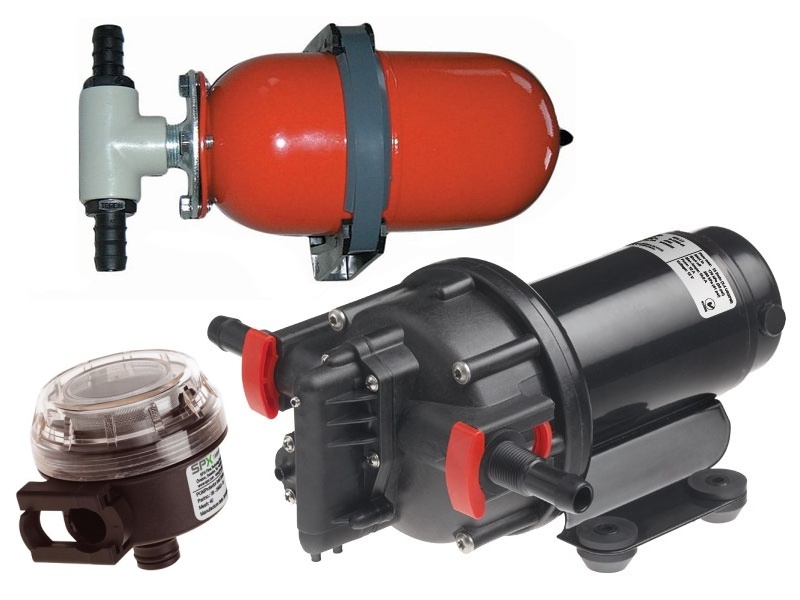
There is a wide variety of pumps available on the market, so deciding which brand to go with can be a challenge. Whichever brand you go with, using a multi chamber diaphragm pump is probably the best option, as they deliver a smooth water flow. I did quite a bit of research on pumps before deciding to go with a Johnson WPS 4.0 pump and the 2 litre accumulator. These pumps can be run dry without causing damage and have a low power draw. A strainer is also fitted to prevent debris and other particles from damaging the pump. The Johnson pumps are made in USA and have a good reputation for reliability.

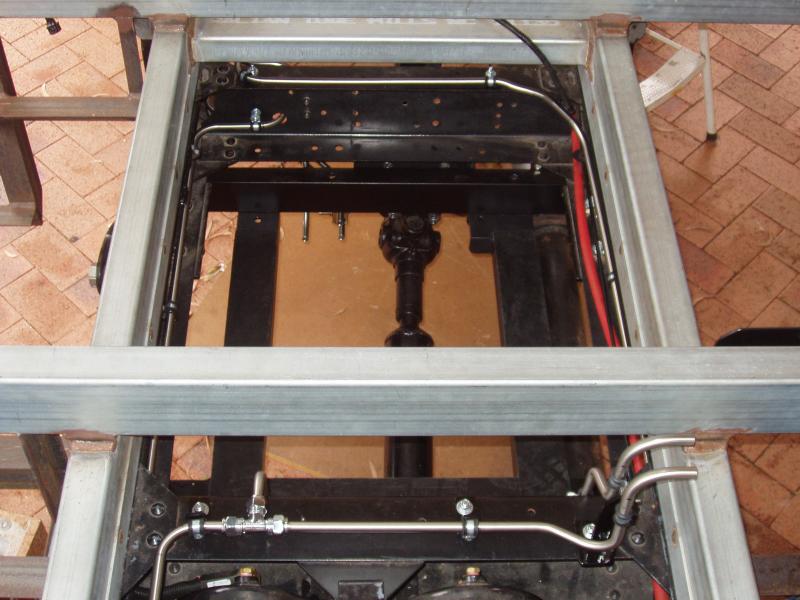

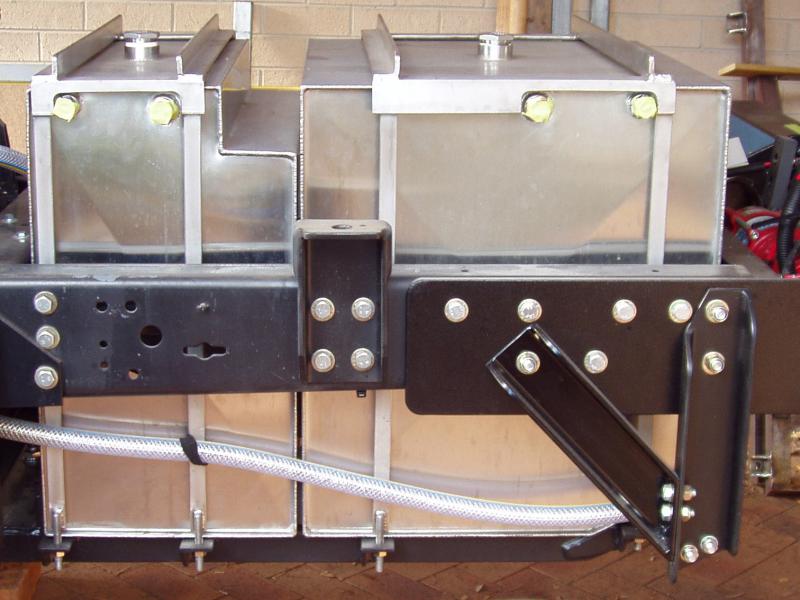
A custom bracket was made to hold the pump and accumulator and this was fitted in the bay directly above the rear diff. As with the fuel lines, I did as much as possible of the pipework in stainless steel. It was no small job bending the ½” tubing to fit within the chassis rails but in my opinion it was worth the effort. All of the water pipework was insulated to reduce the possibility of freezing and to help with vibration dampening.
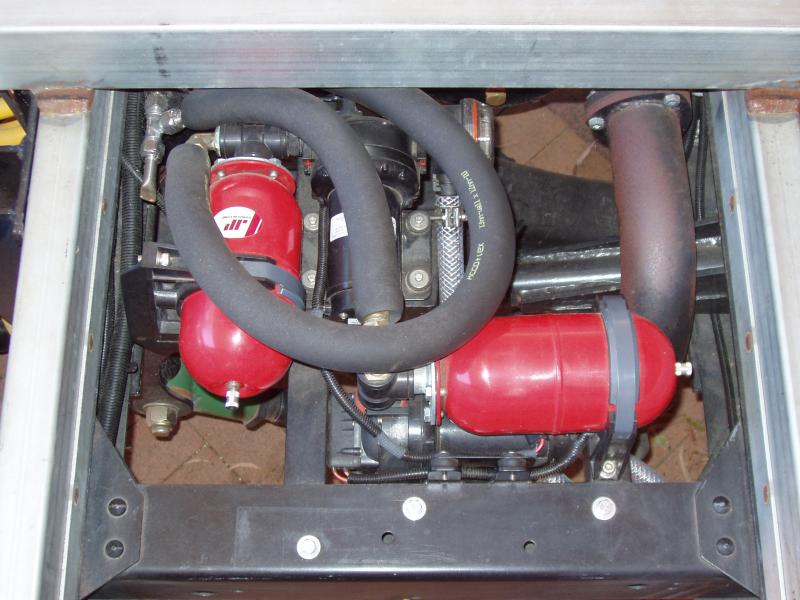
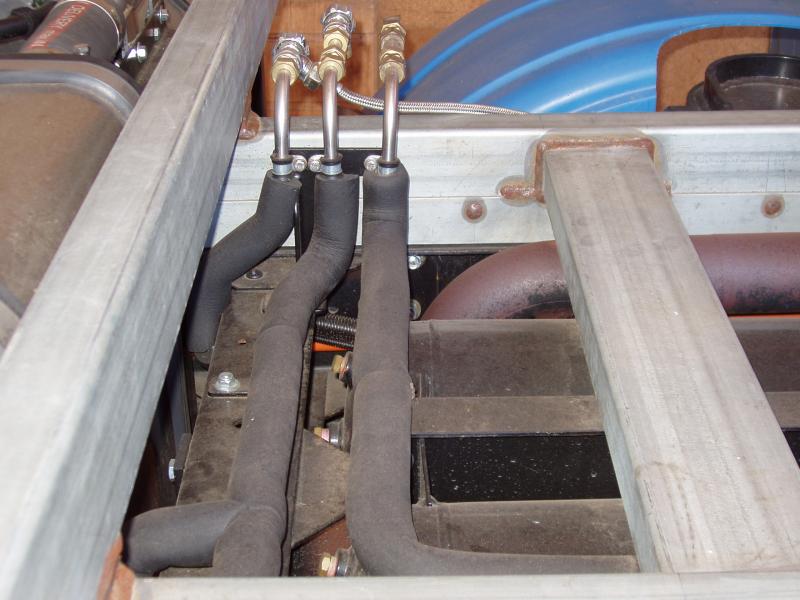
As mentioned, my initial plan was to only have one water tank and one pump, but after some discussions with others I decided that having separate fresh and drinking water systems would better suit us, especially given Sharon’s medical issues. Luckily, there was enough room next to the first pump to locate another pump and accumulator without having to make any major changes. Some more pipe was bent and a new bracket to hold three pipes was made, along with a second pump and accumulator bracket.
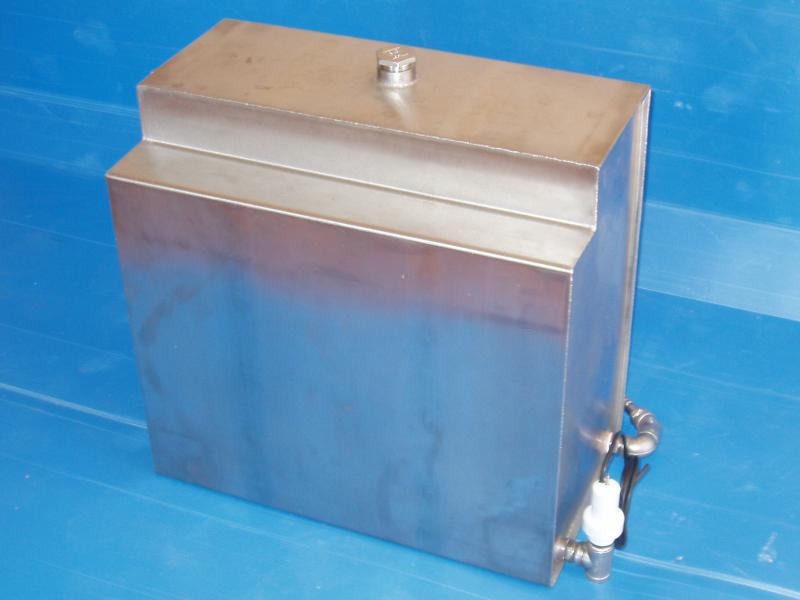
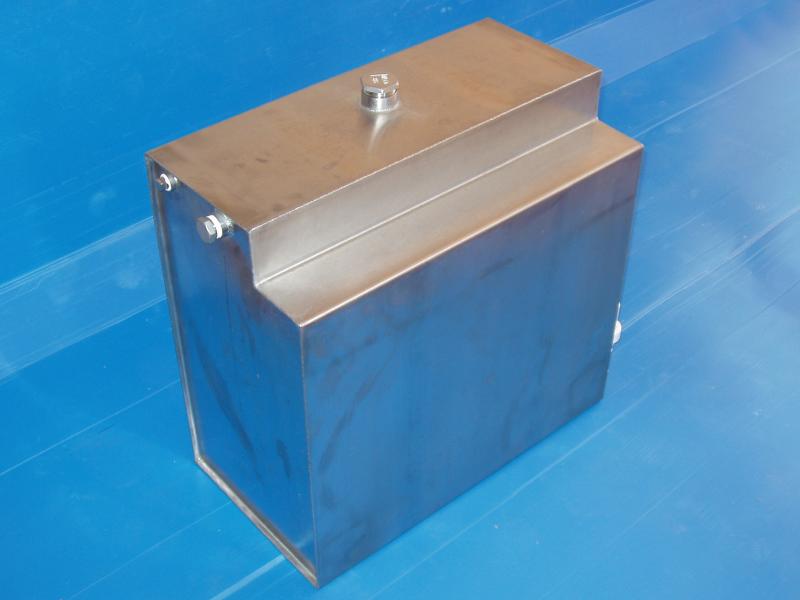

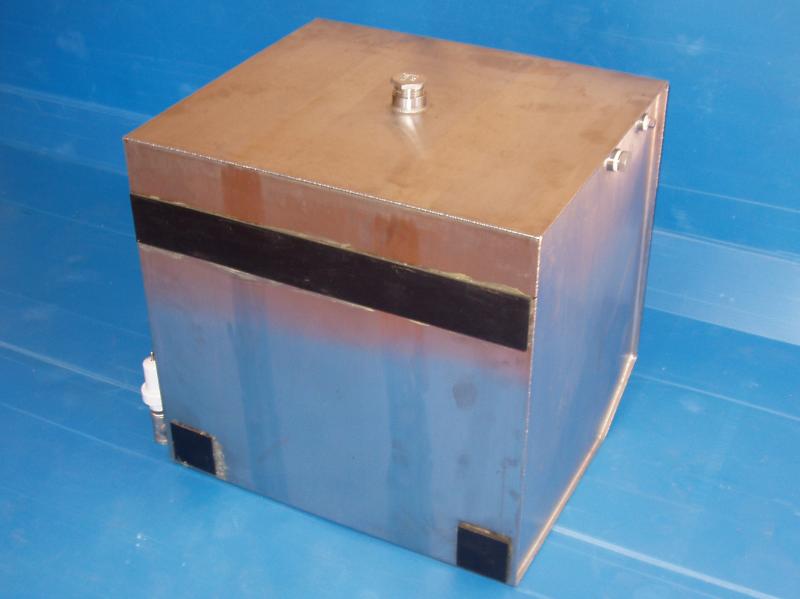
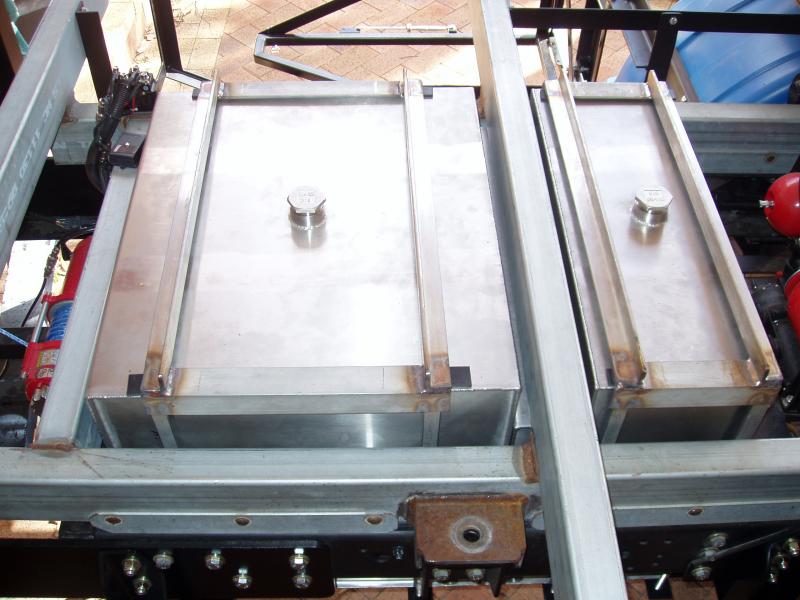
Despite what water tank manufacturers say, I have never found a plastic tank that does not taint the taste of the water, especially if the water has been sitting in the tank for some time. Because of this I chose to get custom made stainless steel water tanks fabricated. Stainless tanks are definitely more expensive and heavier than plastic tanks, but I am willing to wear that in order to get untainted water.
Both of the water tanks are made from 2mm, 304 stainless steel sheet. The pump pickups are on the side of the tank, which is good for avoiding damage, but this creates a bit of a problem. As soon as the water level in the tanks drop below the top of the pump pickup the pump will start sucking air. Given that the top of the pickup is about 35mm from the bottom of the tank, this would noticeably reduce the amount of usable water in the tank. To limit this issue I modified some 90 degree stainless elbows and had these welded to the bottom of the tank. The elbows had notches machined on both sides of the base, which lowered the pickup height to 10mm. Sorry, I forgot to take pictures of the elbows before they were fitted.

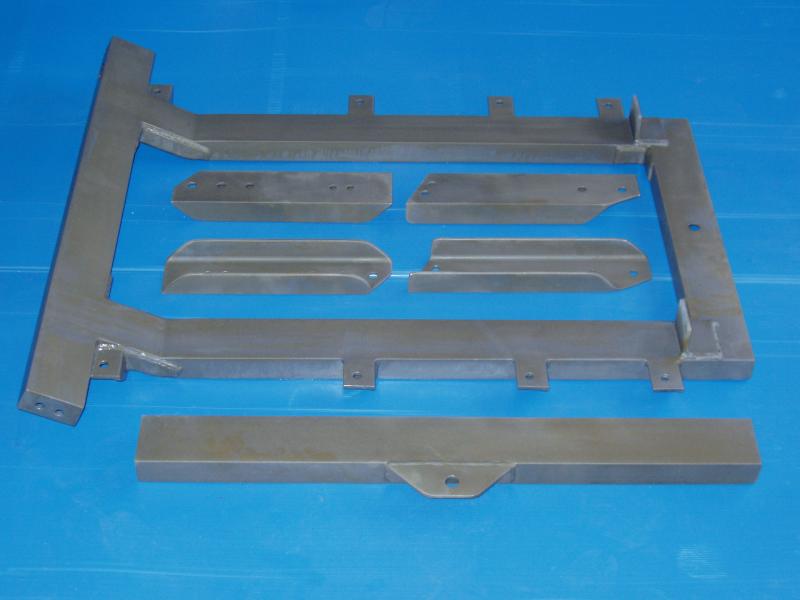
The design of the tank mounting system had to take into account the weight of the tanks as well as the weight of the water they will hold. The weight of the mounting system itself needs to be included too. The total weight came to approximately 330Kg, which is quite substantial. It should also be noted that this is the static weight. When designing mounting systems for items fitted to moving vehicles, the weight of the load should be multiplied by at least twenty to estimate the dynamic forces that could exist in an accident. Using that theory, the tank brackets need to be designed to withstand at least 6.6 tonne (66kN).
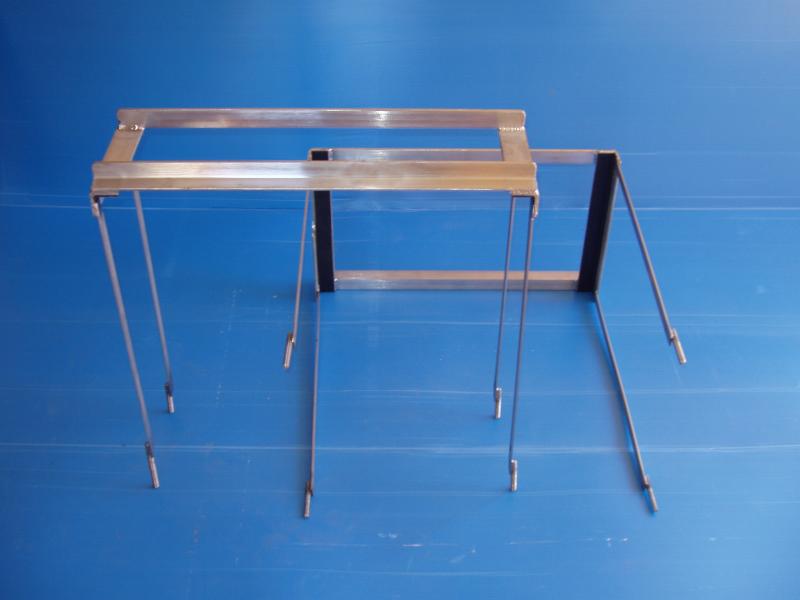
The design I am using for the water tank brackets is very similar to that used for my primary fuel tank. The tank’s main support frame and all of the supporting legs, that connect the support frame to the chassis, are made from 75mm structural C channel. To allow for chassis flexing, the front mount for the tank frame will be a heavy duty 16mm heim joint. The heim joints I am using, for both the fuel tank bracket and the water tank bracket, are rated at 80kN (8 tonne), which should be more than sufficient.
After a reassessment of my water tanks bracket design I realized that I was not taking my own advice when it comes to building things strong enough to withstand collisions. The problem was that in my original design I had only used a single leg on each side at the rear. Taking leverage into account, quite a bit of shear effort would have been applied to the upper mounting bolts, which was obviously not ideal. To remedy this situation a 45° bracing leg was added to each side, which significantly strengthens this area. With this modification I am now confident that the tanks bracket is strong enough.
Another thing I researched for this part of the build were tank sensors. What I was looking for was one style of sensor that could work well with clean, grey and black water. At that time I could not find any commercial tank monitoring system that met my requirements. Because of this I decided to build my own tank sensors and monitoring system, with lots of assistance from my mate Simon. This system will be based around pressure sensors and should be functional and accurate in any shaped tank and with any liquid. When Sharon and I went to the 2013 Sydney Boat Show I did find a system that was nearly identical to what Simon and I had in mind, but that came with quite a hefty price tag.
I will not go into more detail here, instead I will be writing a separate article on this system at a later date. Stay tuned…