 Click any image to enlarge
Well, after much deliberation and research I finally decided to take the plunge and get a diesel performance chip for my truck. There are a multitude of different performance chips available on the market, so the first challenge was deciding which chip technology to use.
To get more power out of a diesel engine you need to give it more fuel. Aftermarket performance chip manufacturers usually do this by either increasing rail pressure or modifying the injector timing. Not surprisingly, each manufacturer will tell you that the way they increase power is the best method, but is it? How do you make an informed decision about which is the best and/or safest performance chip technology?
Here is my take on this subject…
Part of my research involved speaking with some fuel injection specialists regarding any potential issues with increasing the rail pressure. There was an overall consensus that increasing rail pressure will definitely get more fuel going through the injectors, but that increased pressure will more than likely result in additional wear, which may lead to premature failure of the injectors and/or fuel system components.
Something else to consider is that conventional fuel injection systems employ a single injection event for every engine cycle but newer systems can use multiple injection events. The main injection event provides the bulk of the fuel for the engine cycle. One or more injections before the main injection, pre-injections, provide a small amount of fuel before the main injection event. Pre-injections can also be referred to as pilot injection. Some refer to a pre-injection that occurs a relatively long time before the main injection as a pilot and one that occurs a relatively short time before the main injection as a pre-injection. Injections after the main injections, post-injections, can occur immediately after the main injection (close post-injection) or a relatively long time after the main injection (late post-injection). Post-injections are sometimes called after-injections. While there is considerable variation in terminology, a close post-injection will be referred to as a post-injection and a late post-injection as an after-injection. [reference]
In simplistic terms… the pre-injection helps quiet the engine and the post-injection is part of an advanced control strategy to reduce emissions. When you increase the rail pressure every injection event gets more fuel, not just the man injection event, which may not be desirable.
The alternative to raising the rail pressure is to modify the injection timing. The performance modules that use this method normally utilise an intercept harness which goes between each OEM injector plug and the injector. The high end versions of this style of power module can differentiate between the various injector pulse signals which means that the main injector pulse can be identified and modified without affecting the pre and post injection pulses. Some companies that produce modules that increase rail pressure argue that increasing the injector pulse duration is inefficient, as it adds additional fuel too late in the engine’s power cycle. On an engine that spins at a high RPM I could understand this logic, but most diesel engines red line at a relatively low RPM; mine for example tops out at 2,900 RPM. Given that the injector pulse timing is modified in microseconds, I do not believe that this is a valid argument.
Warranty periods up to six years are offered by some performance chip manufacturers, which sounds pretty impressive. Bear in mind that unless you are doing 50,000 Km/year, or more, you may not see the adverse effects of wear on the injectors during the warranty period from a chip that increases rail pressure, but rest assured, your injectors and fuel system components will be wearing out faster than an engine that is running standard rail pressures. It’s basic physics… more stress results in greater wear!
It should be noted that the use of any power enhancing chip, be it one that increases rail pressure or one that modifies the injector timing, will result in more stresses being created in the engine, gearbox, clutch and drivetrain. There’s no getting around that if you want more power.
So, from what I have written above, it is probably not too difficult to figure out that I decided to use a module which modifies the injector pulse timing, opposed to one that increases the rail pressure. After looking at what was available, I chose to buy a Steinbauer performance chip.
Installation…
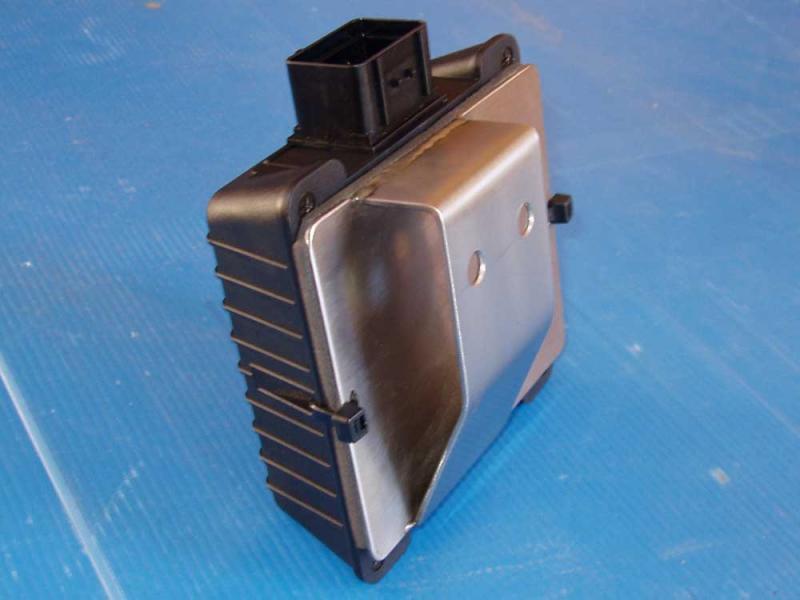

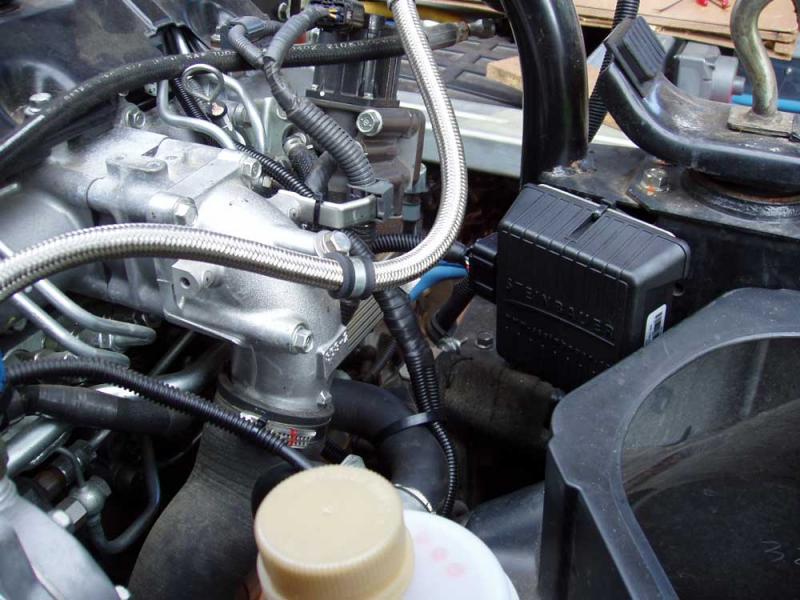
The first thing was to find somewhere to fit the Steinbauer module. The only logical place was in the area where the passenger’s side cab latch is located. I could have simply cable tied the module here, but there is a significant bend in the bracket, so that was not an ideal solution. Instead, I made a stainless steel mounting bracket. This bracket bolts through some existing holes and the module is cable tied to the bracket. A piece of 6mm thick high density foam was glued to the bracket to provide a bit of cushioning.
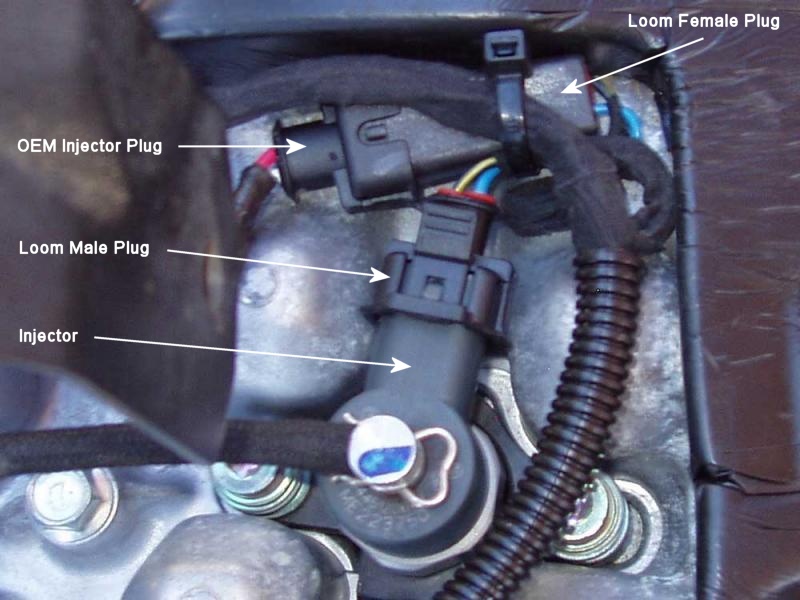
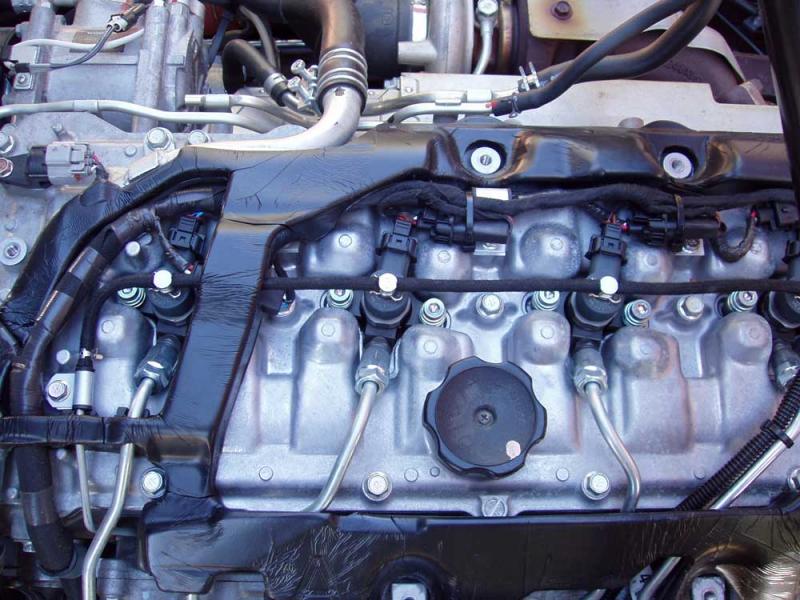
As mentioned earlier in this article, performance modules that modify the injector timing normally utilize an intercept loom. To fit the loom, each OEM injector plug is disconnected from the injector and plugged into the female plug on the loom. The corresponding male plug on the loom is then plugged into the injector.
This task sounds simple, but on my engine it was quite time consuming positioning all of the plugs, due to the limited space available. After a bit of stuffing around, optimal positions were found for all of the plugs.
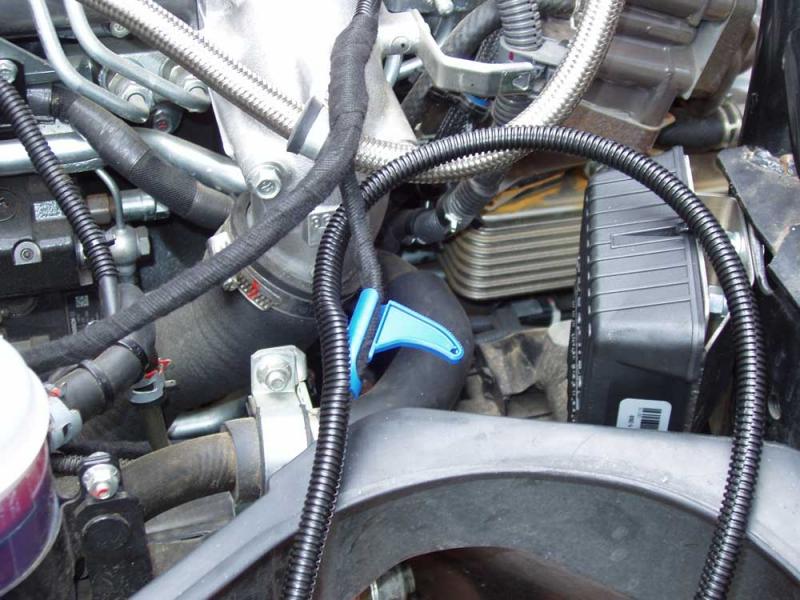
Wiring up the loom is pretty straight forward. There is a power and earth wire, a reference wire and an optional switch wire (for enabling/disabling the power chip). As delivered, only the power and earth wires were wrapped together, so to make the loom neater I wrapped all of these four wires together. This four wire loom was then given a bit more wear protection by covering it with split conduit. The four wire loom was then run along the chassis and up into the cab, where I have an accessories electrical fuse panel.
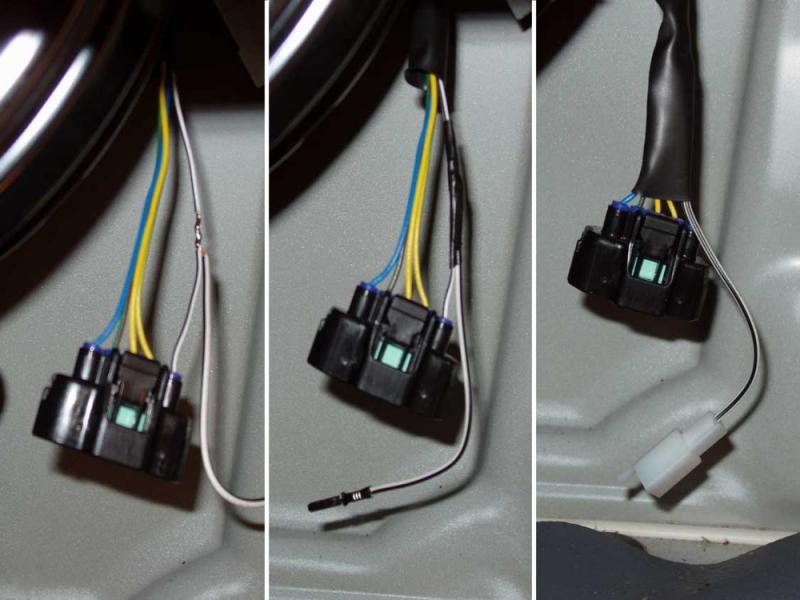
The Steinbauer module’s reference wire needs to be connected to the signal wire that comes from the accelerator sensor. The workshop manual identified this to be the white wire with a black stripe. The plug for the sender is located behind the brake vacuum booster, so I removed the accelerator mechanism to get easier access. The plastic tubing that covered the wires was slid up so that I could access the signal wire. Some insulation was removed from the signal wire and another wire was soldered to it. The joint was covered with insulation tape and the tubing was slid back down to cover all of the wires.
Because I saw no reason to have power running to the Steinbauer module constantly, I wired the positive wire to the ignition side of the circuit. This is contrary to the provided installation instructions, but an email to Steinbauer Australia confirmed that this was not an issue. The power wire was also connected through a fuse, even though I was told that this was not necessary.
The switch wire was run up to the instrument cluster where a simple on/off switch was installed. As delivered, the switch wire is tucked back into the loom and not used. To disable the module this wire simply needs to be connected to earth, which is what turning the switch on does.
The installation of the Steinbauer module took considerably longer than I had expected, but that was primarily because I am somewhat pedantic about how I install things. That aside, I’m happy with the end result. It is nice and neat and looks like it is meant to be there.
So… how well does it work?
To be honest, it’s a bit early to tell, but during the short test drive I took after installing the module I could definitely tell when the unit was turned on and when it was turned off. I will do some more testing in the coming months and report back then.
Realistically however, I will need to wait until I have finished the camper to be able to give a true assessment of this power module, and I have no idea when that will be…
A little side note…
For anyone in the US or Canada that owns a FG140 (4.9 litre, 4M50-3AT7 engine), this Steinbauer chip works perfectly on that model Canter.
If you want more detail, just send me an email.