 Click any image to enlarge
Unlike all of my other tanks, which are made from stainless steel, the grey and black water tanks are made from plastic; Polyethylene to be precise. Surprisingly, there is not a significant difference in price between custom made stainless steel tanks and custom made plastic tanks, but the 10mm thick plastic tanks are significantly lighter than similarly sized stainless steel tanks.
I thought the tank and bracket design would have been quite straight forward, but it was complicated by the changes I had made to the rear support brackets of my fresh water tanks. Positioning the pickup, drain and sender holes proved to be challenging, but by using a cardboard mock-up on the truck I was able to find a workable solution. The final design is not exactly as I would have liked it to be, but it is functional.

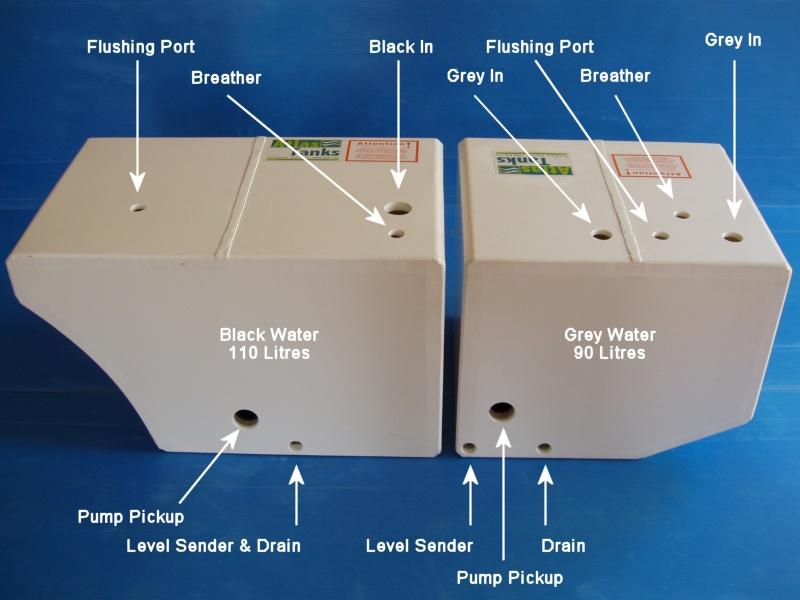
Like my fresh water tanks, I designed the grey and black water tanks to have the pickups on the sides of the tanks. So the maximum amount of waste can be pumped out, elbows were fitted internally to reduce the pickup height to a minimum. This method is not as effective as having the pickups on the bottom of the tanks, but it has the advantage of having no projections under the tanks, which is desirable in extreme four wheel driving situations, where the underside of tanks may come in contact with the ground.
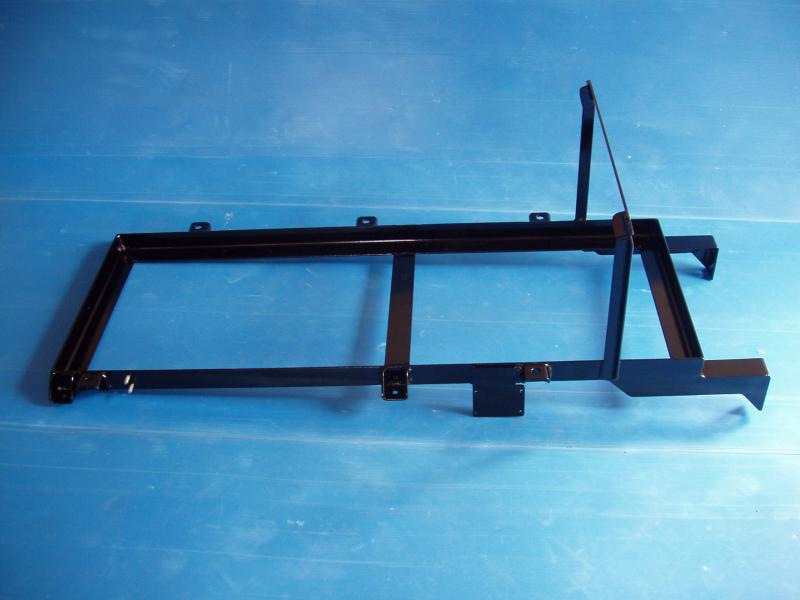
The basic concept for this tank bracket design is quite simple; neatly fitting upper and lower 50mm x 5mm angle iron frames held together with lengths of M16 stainless steel all thread.

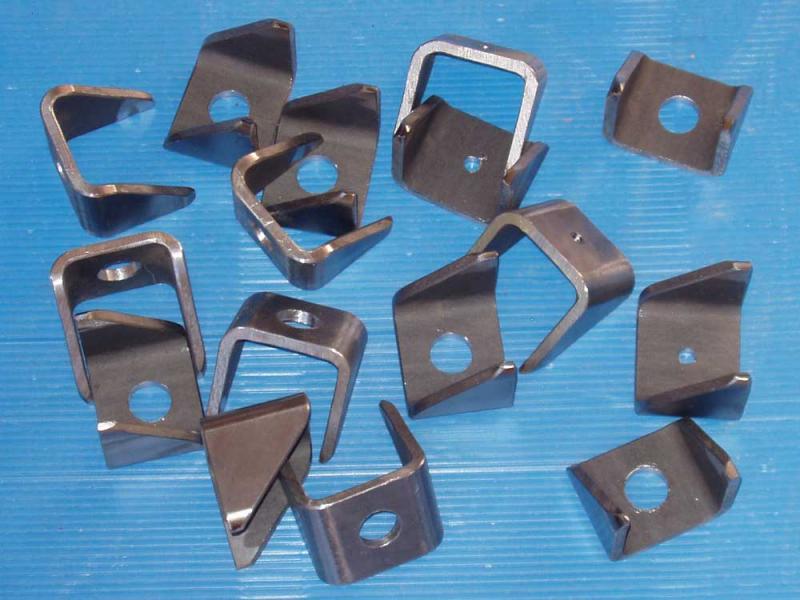
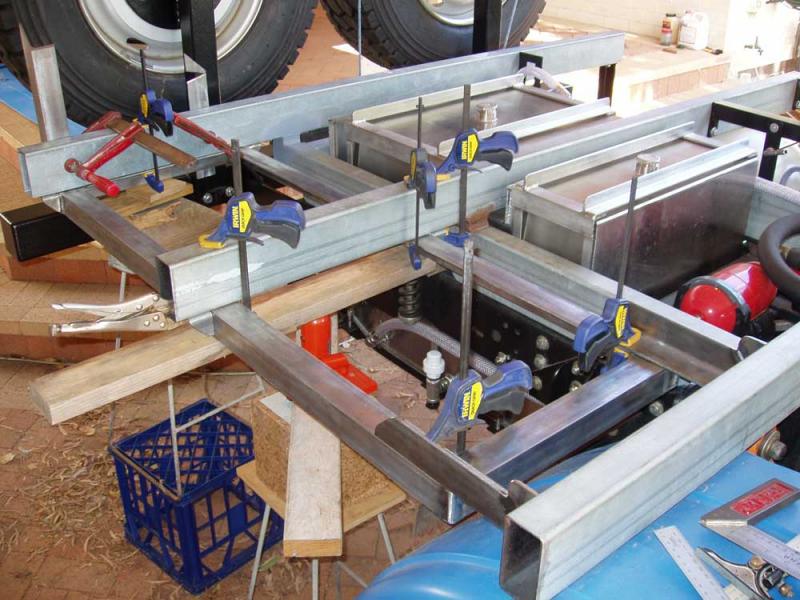
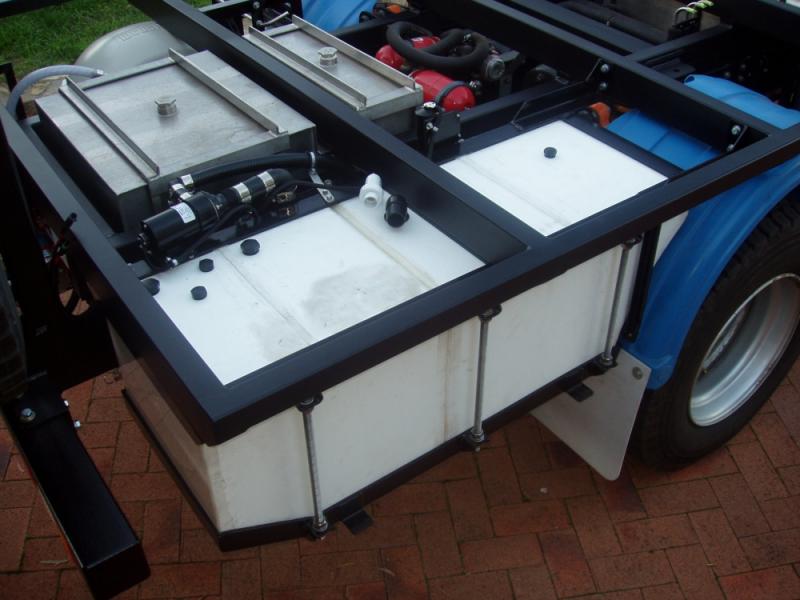
To mount the upper frame to the subframe I utilised the same method I have used previously, that being stainless steel nuts welded onto a plate, then fixed inside the RHS. The brackets that hold the upper and lower frames together were made from 50mm x 5mm SHS. To ensure correct alignment of all the pieces, the upper tank frame was clamped to the subframe and then the mounting brackets were tacked into place.
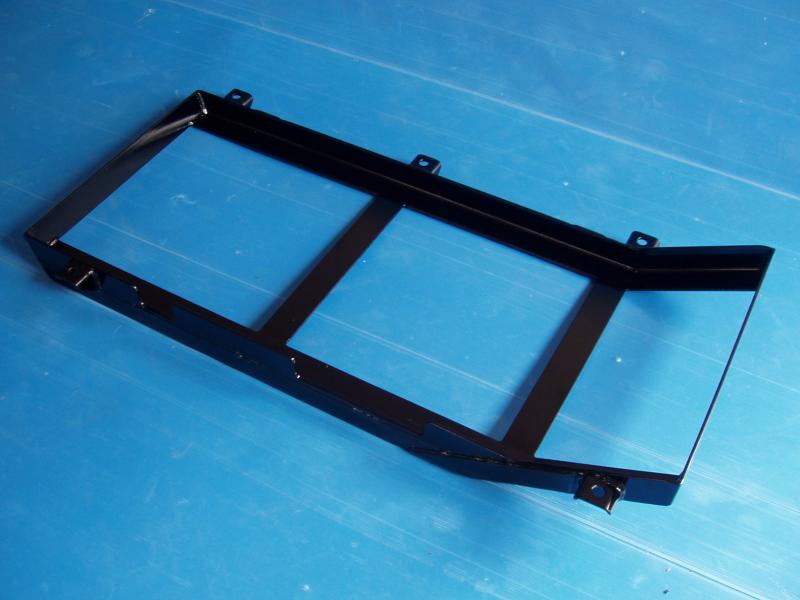
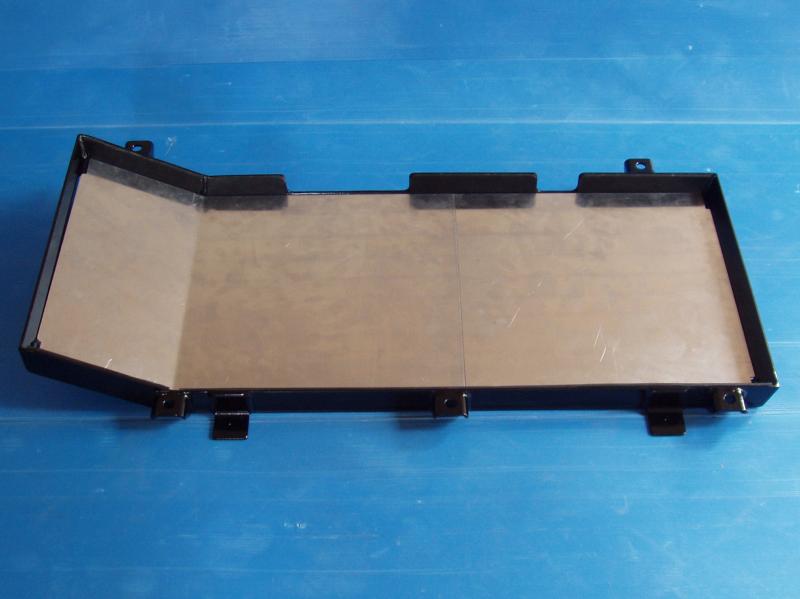
The tank frames were literally built around the tanks. Using 5mm thick rubber as a spacer, the frames were constructed to be a very neat fit. The lower tank frame has cut-outs for the fittings and the upper tank frame has mounts for the macerator pumps and mudguards. Aluminium sheet protects the bottom of the plastic tanks from stones.
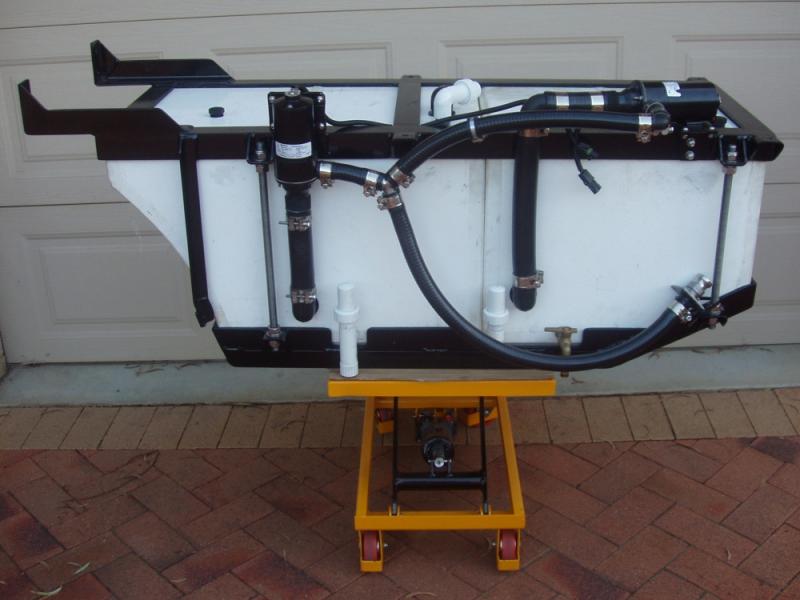
While building the tank frames I had serious concerns about the difficulty I was experiencing installing and removing the tanks. At this point of the construction, access to things is pretty good but this will change significantly when the body and side skirts are fitted. At some point during the designing and building process I determined that removing an individual tank would be quite complicated and problematic. That was not really acceptable and does not fit with my overall design concept of making everything as accessible as possible, for the times when repairs or maintenance is required. What I decided to do in this instance was to make the entire grey and black water setup as a single removable module. This may sound like a complicated approach, but in reality it was the complete opposite.
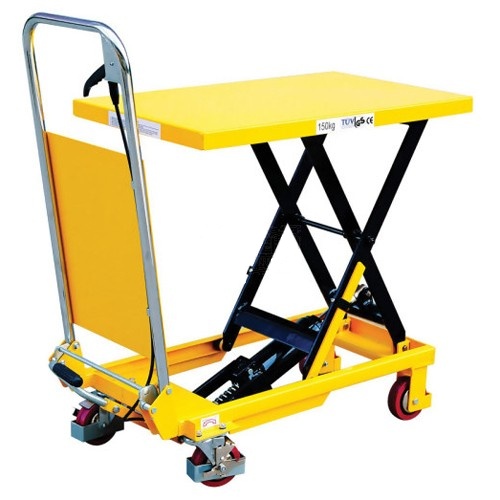
The only real problem with this approach was that the grey/black tank module weighed in at about 75Kg, making it difficult to lift unassisted. To resolve this issue I purchased a small 150Kg hydraulic scissor lift, which handles the task effortlessly.
I now use this scissor lift for many other tasks and wonder why I procrastinated so long before buying one. At about $300 it has more than paid for itself in the short time I have owned it. Definitely a recommended workshop tool, in my opinion.
When I started this specific part of the project I had totally different plans for the tank emptying system setup than what I ended up with. Ideally I would have liked to use a single macerator pump and a marine Y type diverter valve to switch from one tank to the other. Unfortunately, no matter what designs I tried, nothing really worked with my existing layouts. Finally I had to concede and design my system with one pump for each tank. Each pump was soft mounted to the top tank bracket (rubber sheet between the pump and the bracket). One of the challenges was routing the pipework efficiently. To many this might sound like a very simplistic, straightforward task, but I spent many hours “chopping and changing” things before I ended up with a layout I was happy with.
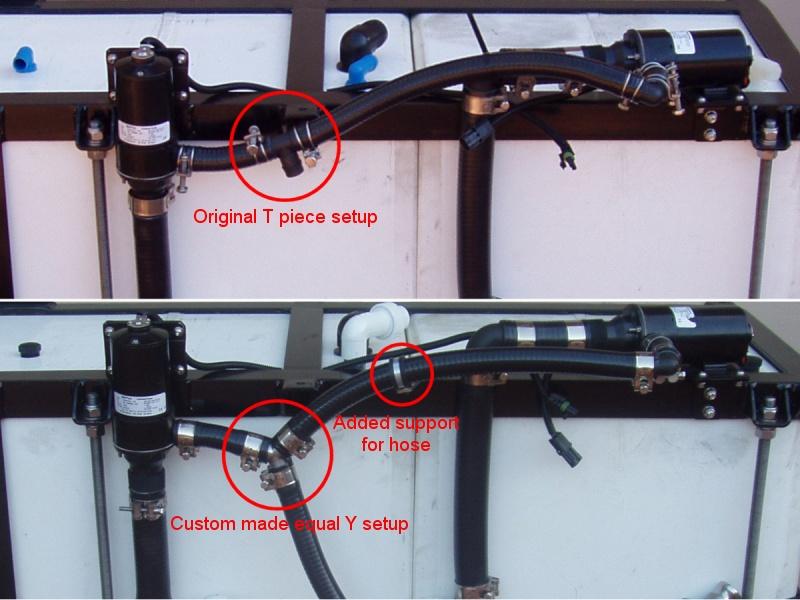
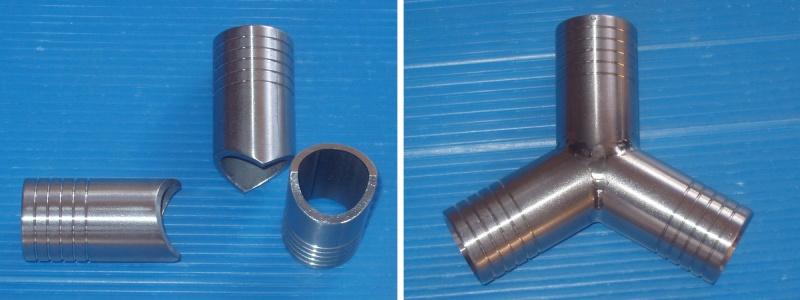
The initial layout used a 25mm T piece to connect the two pump outlets. Although functional, I didn’t really like the T piece being higher than the outlet of the black pump. I could have probably lived with that situation if it were the grey pump outlet, but figured there’d likely be problems on the black side, so an alternate plumbing solution was required. To cut a long story short, I was unable to source a suitable 25mm, equal Y connector, so I had to make one myself. With the equal Y fitted, and an additional support bracket for the pipe coming from the grey pump installed, I was much happier with the pump-out plumbing setup. High quality suction hose was used for both the pick-up and pump-out sides of the pumps.
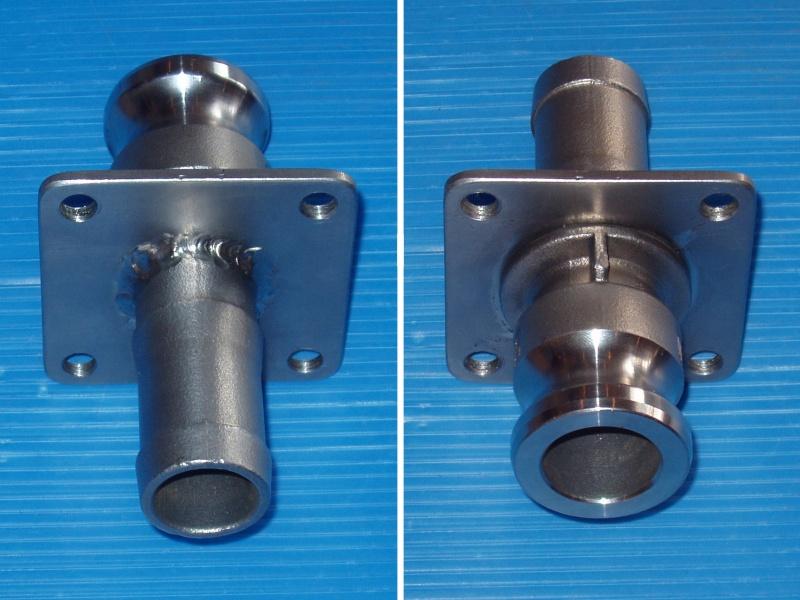
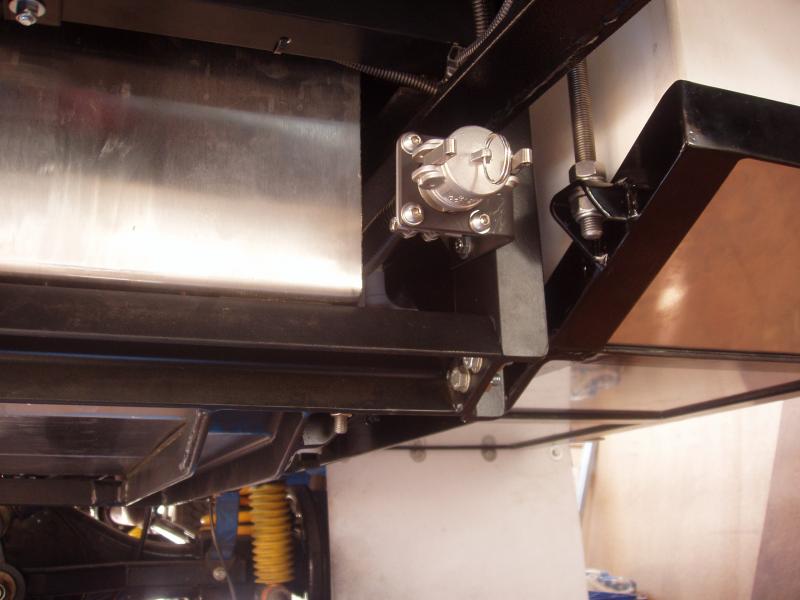
At the rear of the truck I wanted to use a stainless steel Camlock fitting for the pump-out connection point. I looked for a suitable bulkhead Camlock fitting, but found that they do not sell these. I bought a 25mm stainless steel E type Camlock fitting and made a suitable mounting plate for the back of it. This plate was then TIG welded to the Camlock fitting, giving me the bulkhead fitting I wanted.
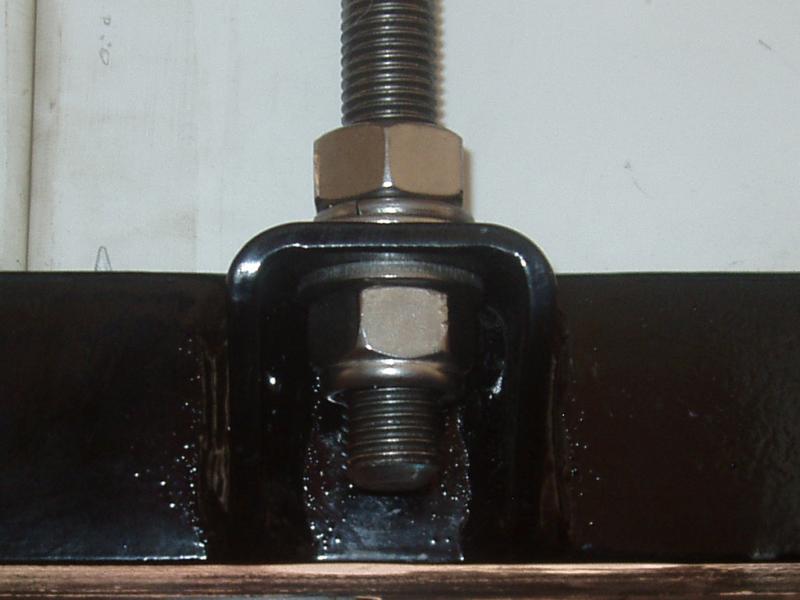
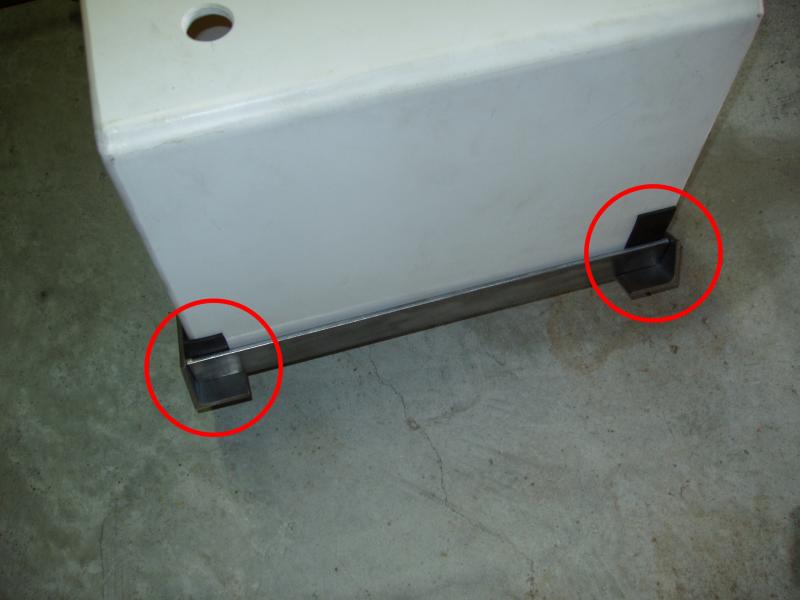
Both tanks are sandwiched between the top and bottom tank brackets and held together with M16 stainless steel threaded rod and nuts. As mentioned previously, the tank brackets were designed to be a very neat fit. The logic behind this approach is that only minimal clamping force is required to securely hold the tanks in place. In fact, with the grey/black “module” assembled, there is only a very small force being applied to the tanks. By having a nut on either side of the upper and lower mounts, this changes the threaded rod from being a simple joiner into being a fairly strong and rigid side support.
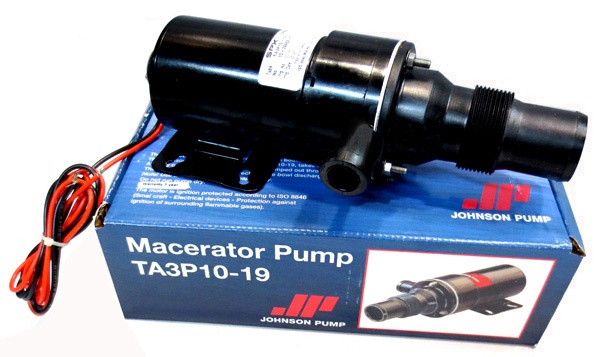
To empty the grey and black tanks I chose to use Johnson TA3P10-19 macerator pumps. These pumps are mounted directly to the top tank bracket and are integrated as part of the grey/black tank module.
Should something go wrong with the pumps, or the plumbing, it is significantly easier to do the repair by removing the entire module, given that it is very awkward to get to them in any other way. I could not find Supra clamps which were the right size for the 25mm hose; one size was too small and the next size up was too big. I tried double wire clamps, but was not really happy with them. I ended up using some vulcanizing tape to up the OD of the hose, so I could get good clamping pressure with the Supra clamps.
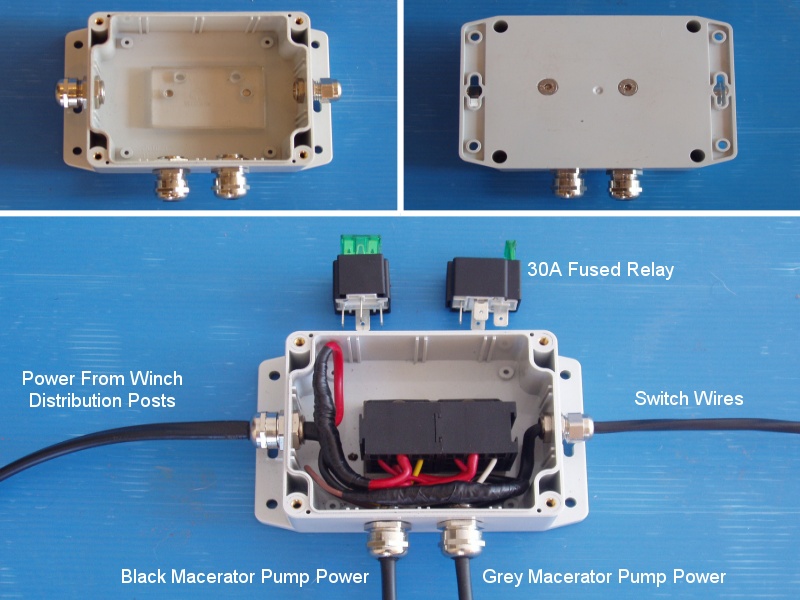
I could have run individual power wires for each pump from the front of the truck, but to do this I would’ve had to use fairly large cable in order to overcome voltage drop issues. I already have large isolated and fused cable running to the spare tyre winch, so I chose to utilise this. I built a watertight fused relay enclosure and ran some light gauge switching wire to the house battery area, where the switches for the pumps will be. Relay switching higher amperage devices is better too.

The grey/black tank module is attached to the subframe with eight bolts, all of which are pretty easy to access. This makes installing and removing the module very simple.
All of the plumbing connections into the top of the tank will utilise barrel fittings. There are easy to disconnect, should the module need to be removed. The only other connections are the two macerator power plugs and the level sensor plugs.
Be aware… using well know companies does not always guarantee ethical business practices.
The grey and black water tanks were made by Atlas Tanks in Queensland. To be honest, I am not overly impressed with this company.
My initial correspondence and communication with them was good, but that definitely changed. I requested that they call me prior to commencing manufacture of the tanks (which was 6 weeks after I placed the order, not 2 to 3 weeks, as advertised on their website) to make sure there were not any issues. At that time I spoke with the boss who assured me, in a somewhat condescending manor, that the tanks would be made exactly as I had drawn them in CAD. When I received the tanks the baffles were running East/West, not North/South, as I had specified. When I rang and asked why this was, I was told that it was not possible to make the tanks the way I had drawn them.
Given the size of the tanks, this was not a deal breaker, but they definitely should have told me this when we discussed making the tanks.
The baffle issue aside…
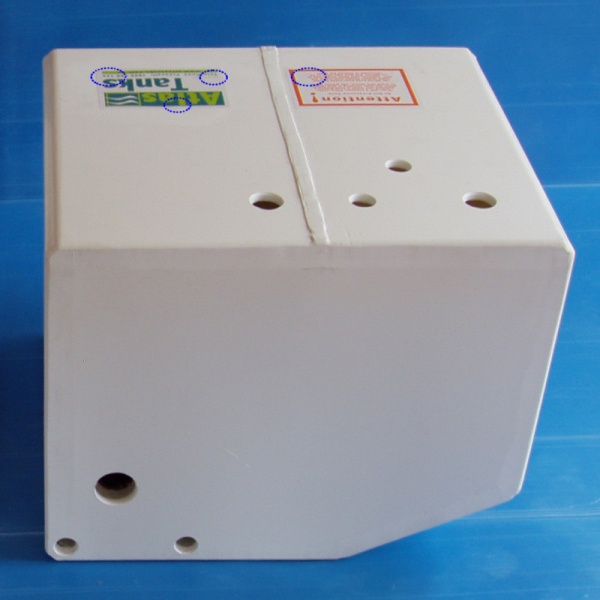
A week later I also discovered, by chance, that the “tradesman” who made the grey tank had initially drilled the four holes on the top of the tank in the wrong position (mirrored on the opposite side). These holes were subsequently welded up, then covered with Atlas stickers to hide the screw up. When I found this out I was seriously pissed off, as I had not paid a premium price for a “repaired” tank. I demanded that the tank be remade or that I be given a significant refund.
Although not totally happy, I accepted a partial refund, as I did not want to take the risk that a replacement tank would not be exactly the same size as the original one. Had I identified this screw up prior to making my brackets I definitely would have had the tank replaced, but I could not take the risk that the replacement tank was not exactly the same, as I was definitely not remaking my brackets. The other thing that I could not believe was that I would have to wait another six weeks for the replacement tank to be made. Even though this was totally their screw up, they wanted to put me to the back of the queue again. Unbelievable!
It’s one thing to make mistakes; we all do that at some point in time, but in my opinion, to blatantly hide the mistakes and make out that everything is perfect is totally unacceptable. The fact that the boss did not really see this cover up as an issue, until pressed, is a whole other issue, but I won’t even go there. It’s probably no surprise that I am still really annoyed about this whole experience.
Bottom line… Ethical businesses definitely shouldn’t operate like this.
I would find it very difficult to recommend Atlas Tanks to anyone after my experiences with them.