 Click any image to enlarge
A general “rule of thumb” when four wheel driving in remote areas of Australia is that your vehicle should be able to carry sufficient fuel to travel at least 1000 kilometres. I have already replaced the OEM 115 litre tank with a 200 litre tank, which should give me that sort of range, but I wanted the ability to carry more fuel, just in case…
I could have setup a complete dual fuel system with two tanks and electronic change-over valves, but I decided not to do this. Instead I chose a different option, that being a second tank with a simple transfer pump.
Given that I am only likely to have both tanks full on rare occasions, a simpler solution seemed logical. Basically, my second tank will be just like a very large jerry can.
There were only a few criteria that had to be met for the design of this second tank.
- Stainless steel construction
- Removable from underneath the truck
- A simple, safe system for transferring fuel from the reserve tank to the main tank
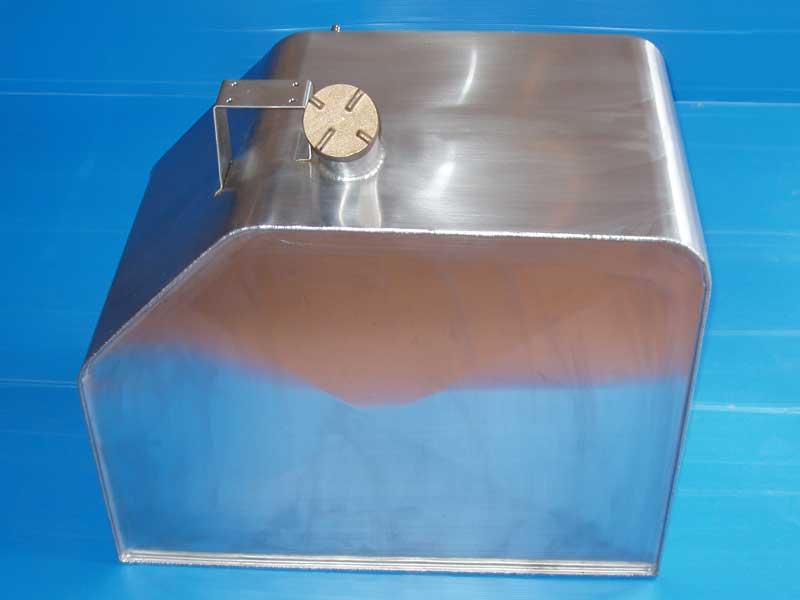

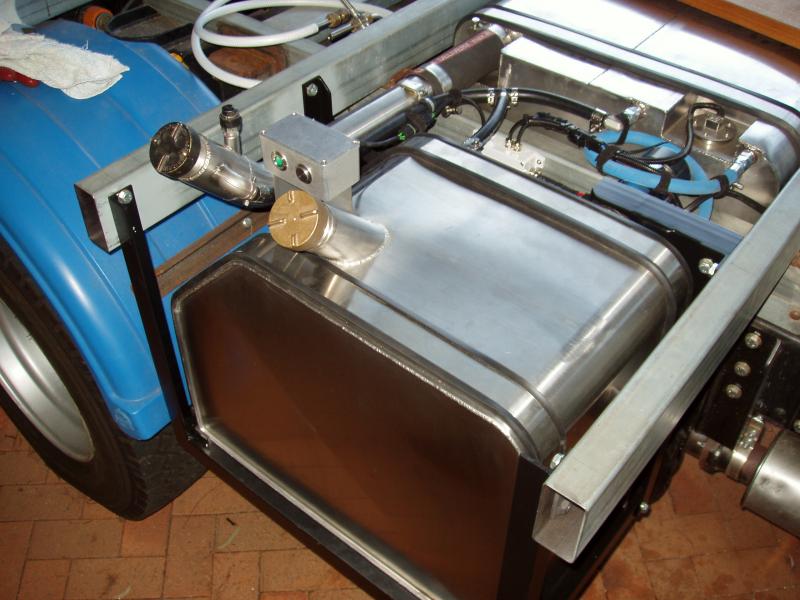
Using AutoCAD, I started doing some design work to get sizing and to produce the drawings necessary for the fabricator. The design I ended up with gives me just over 100 litres and the tank fits neatly in the bay directly adjacent to the primary diesel tank.
The tank is made from 2mm, 304 grade stainless steel sheet and is fitted with one longitudinal baffle.
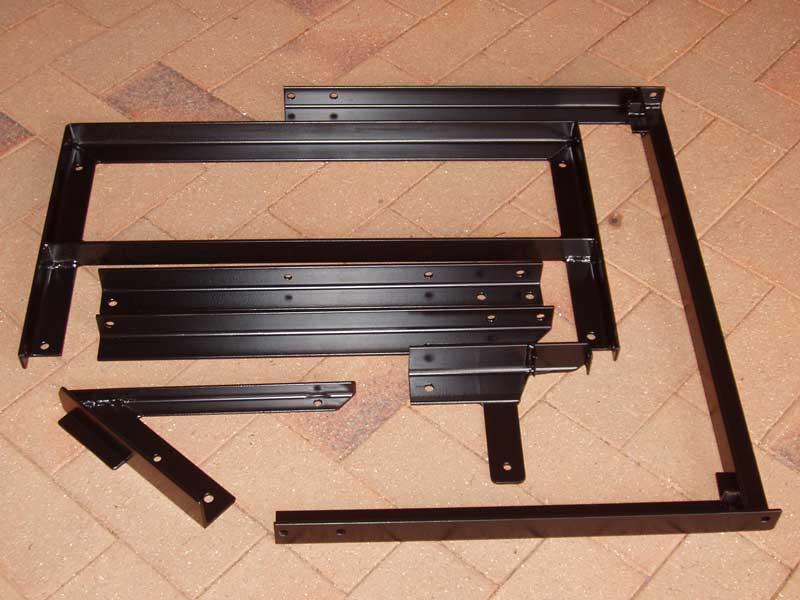
The frame for the reserve tank is made primarily from 40mm x 5mm angle and is attached to the subframe in the same manner as my other brackets, that being the use of captive nuts welded into the subframe RHS rails.
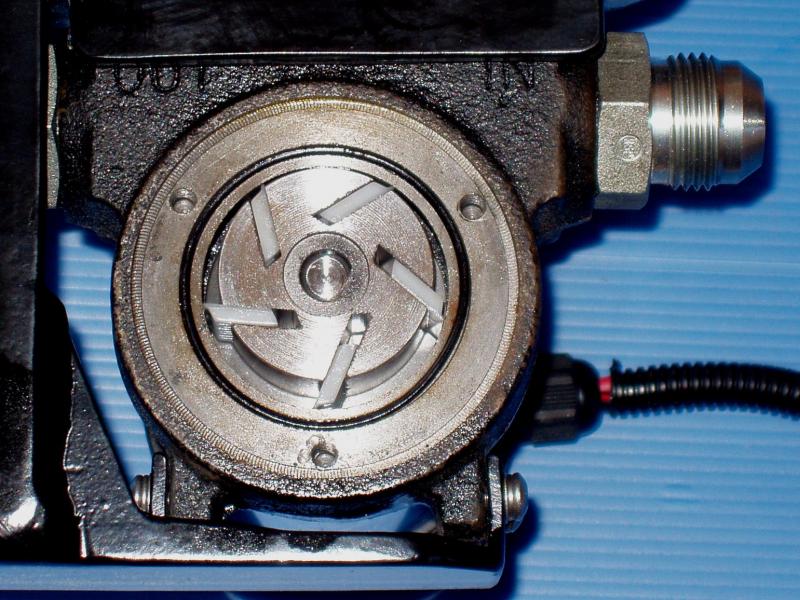
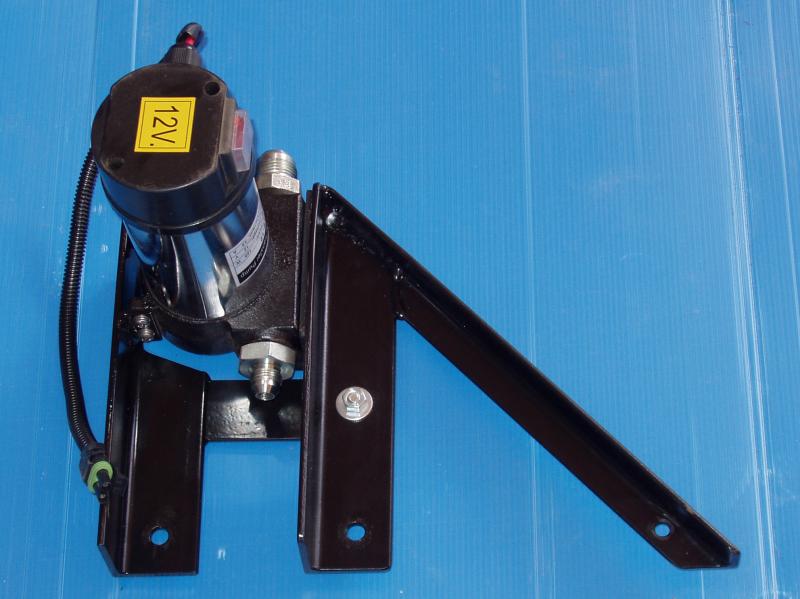
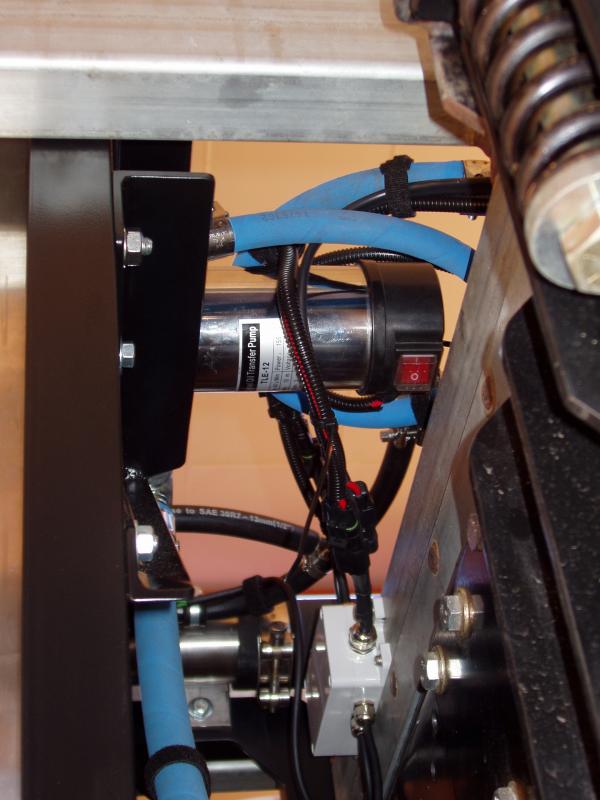
I sourced the transfer pump from eBay. It utilises a fairly basic centrifugal vane pump design and is rated at 40 litres per minute. I will not get that sort of flow rate from it, as I am using smaller diameter hose. Nonetheless, the transfer rate is still quite good.
Initially I was going to use a very simple on/off switch for running the transfer pump, but as anyone that has read previous articles of mine regarding this build would know, simple is not really my thing…
After some discussions with my mate Simon, who builds me the custom electronic controllers for different parts of my truck, it was determined that a bit more “smarts” could be employed in this fuel transfer system.
Long story short… after we determined the specifications, Simon built me a small micro-controller based system that does the following:
- Integration of the main fuel tank sensor into the design, so it is not possible to overfill the main tank (auto cut off when full).
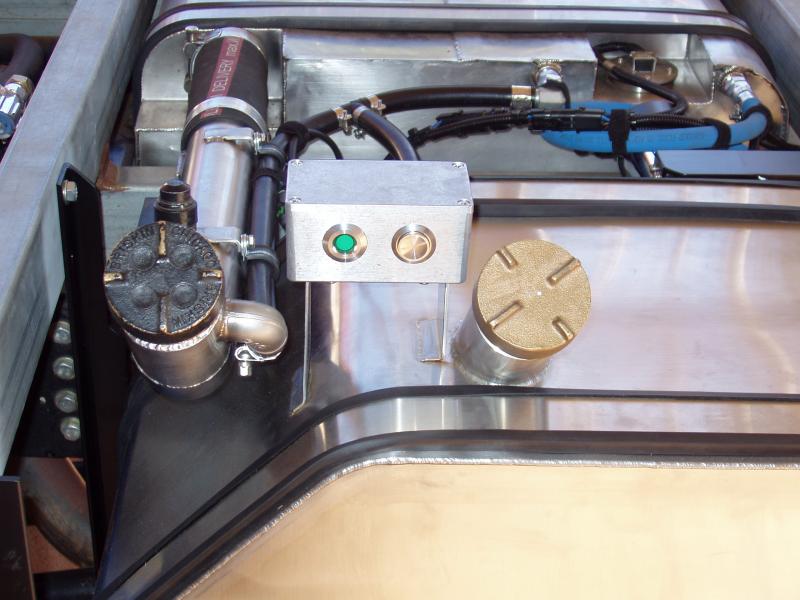
- Included a simple “press to start” and “press to stop” momentary button to run the transfer pump.
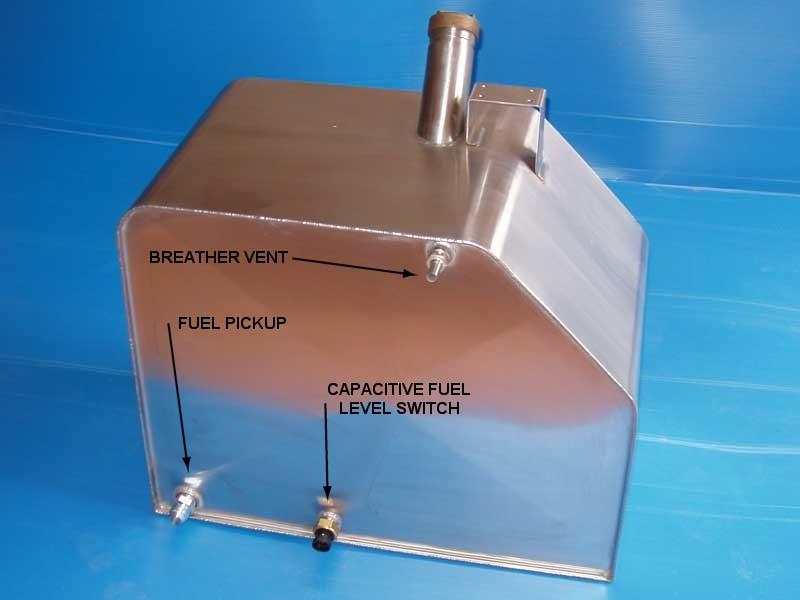
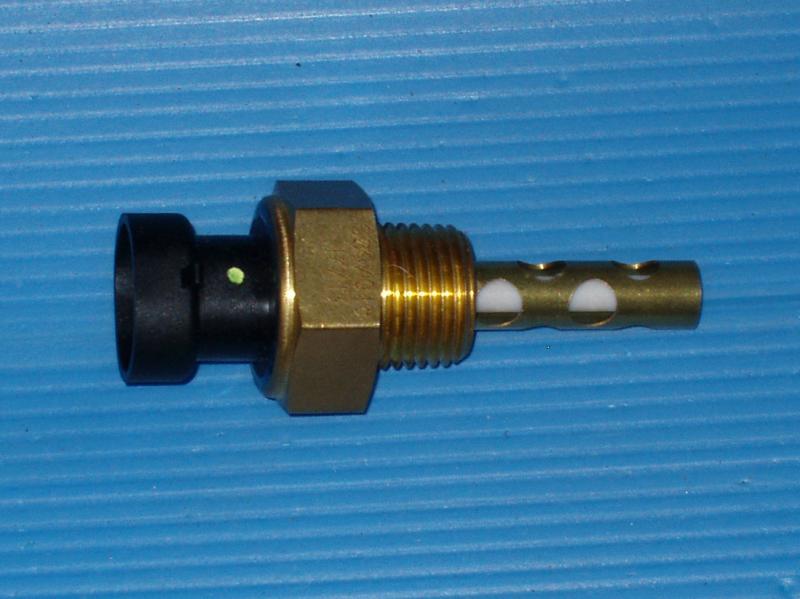
- Utilisation of a capacitive switch to determine if the reserve tank is empty or has fuel in it.
- Manual override functionality that allows for running the pump, even if the capacitive switch says the reserve tank is empty.
This functionality is useful for scavenging any remaining fuel that may remain in the bottom of the reserve tank. - Include “idiot proof logic” in the design, so the manual override cannot be utilised if the main tank is full.
- Addition of an LED indicator that includes error blink codes. This lets you know what’s going on and if something goes wrong.
Again, I became very frustrated when sourcing components for this part of the project. If I have not mentioned it previously, finding suitable components is probably the most time consuming part of this build.

In the end I sourced the switches directly from a factory in China. Luckily, the guy I dealt with was happy to provide small quantities, but the freight costs meant that the unit cost of these switches was quite high. Nonetheless, I love the switches and LED indicators I got and I am very happy with the quality.
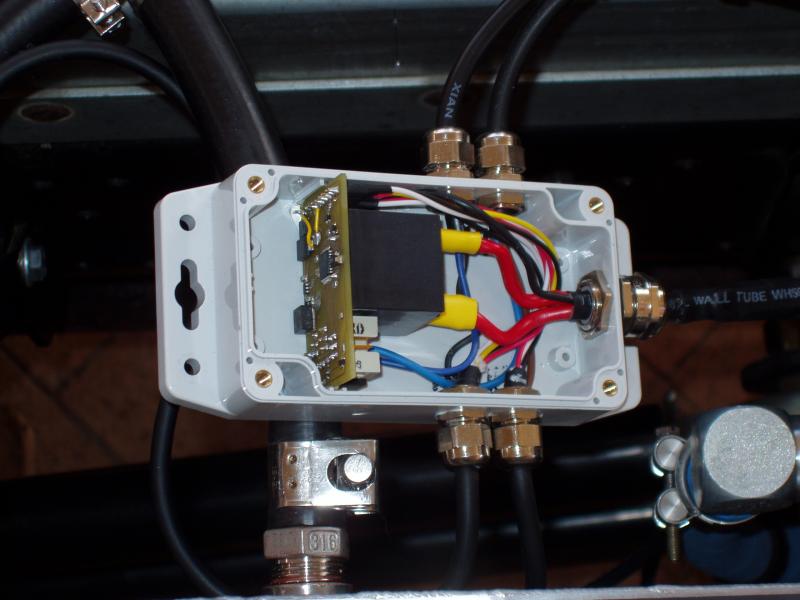
The main electronics for the system are housed in a standard polycarbonate waterproof box that I got from Jaycar. Five cable grommets were utilised to ensure that moisture did not enter the box via the cable entry points. An automotive relay has been utilised to switch the high current of the transfer pump. We could have used electronic relays, but the mechanical ones are reliable and cheaper. Two cables are for the main fuel tank sender wires; in and out. One cable goes to the capacitive switch and another cable goes to the momentary switch and LED indicator. The final cable is for power and earth in and power out for the transfer pump. The box is mounted to the side of the subframe and is relatively easy to access from underneath.
The waterproof aluminium box that houses the momentary switch and the LED indicator also came from Jaycar. This box is attached to a bracket on the reserve tank with 4 x M5 stainless screws and rivnuts (nutserts) in the bottom of the box, making it a very sturdy fixture.
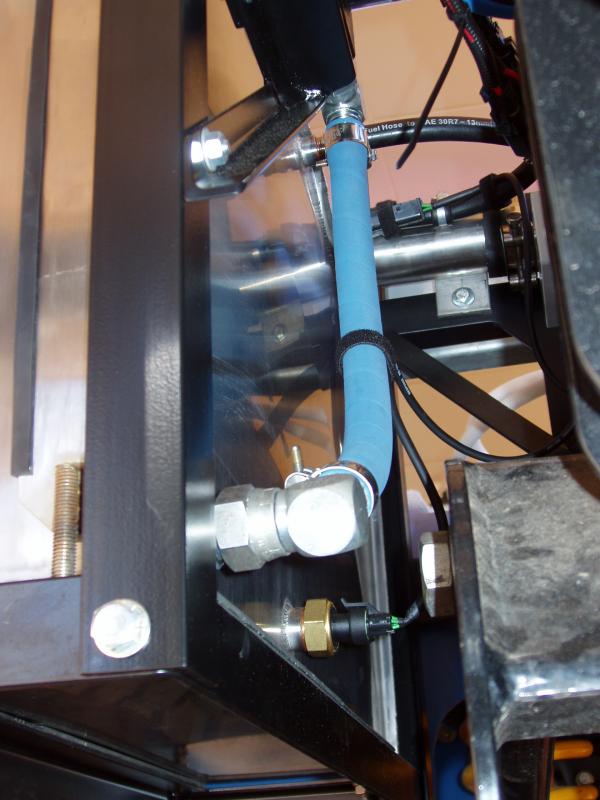
Like with the main fuel system, I chose to use Aeroquip hoses to connect the two tanks together. Aeroquip hoses are definitely not cheap, but as far as I am concerned, they are probably the best hoses available for fuel, and that’s why I have used them. I also used JIC fittings for the hoses, opposed to just using hosetails. One of the problems with fuel hoses is that they tend to “weld” themselves to the hosetail after a period of time. Using the JIC fittings allows for easy removal of the hoses from the tanks, should this be necessary, but they too are very expensive. At the end of the day, I did not get any change from $300 for the hose and all of the connectors… ouch!!!

When I transfer the fuel from my reserve tank to the main tank I am unable to empty the reserve tank completely, due the fact that the fuel pickup is on the side of the tank, not on the bottom. This is by design, as it removes the potential of damaging the fuel pickup when off road. Having fuel stand in the bottom of the reserve tank could potentially result in that fuel going stale if left there for an extended period of time.

My solution to this problem is quite simple…
Given that 100 litres of fuel allows me to travel more than 500Km, I see no need to fill my main tank more than this, unless I plan on going to more remote locations.
Basically… less fuel = less weight = better fuel economy.
To that end, I will be filling my reserve tank then transferring the 100 litres it contains to my main tank. This will allow me to circulate the small amount of fuel that remains in the bottom of the reserve tank (about 5 litres), negating the possibility of it going stale.
Although this is probably a more complicated setup than is required for a transfer pump system, it works well and I am very happy with how it all turned out.