 Click any image to enlarge
Before building the actual moulds for my camper body it seemed logical to make at least one test mould and confirm that what I wanted to achieve was possible with the limited composite skills I currently have. After all… I did my trade as a Fitter & Machinist, not as a Shipwright.
As detailed in a previous article, I did undertake a commercial composites course at the Newcastle TAFE, where I managed to get about 200 hours of “hands on” training and experience. Realistically, that is not a lot, but it’s definitely better than nothing. Sadly, the composites section, that was part of the Newcastle TAFE’s shipwrights area, was closed a few years ago, so now it is even harder for people like myself, that are not in the boat building trade or working in the composites industry, to find places where you can get structured tuition in fibreglassing techniques. Sad, but true!
Early in 2015 we went to Queensland to get some rectification work done on the truck and to pick up the core material that would be used for the camper body panels. I had also arranged with the owner of Cure Composites, the composite business from which I was buying the core material, to spend some time in their workshops to see how “the professionals” did things.
The two and a half days I spent working with these guys completely changed my perception of what was possible. I was allowed to chip in and help with the building of a large moulded part and also a very large flat panel during my time there. The hands on experience I gained during my time at Cure, along with numerous tips and tricks the guys freely shared with me, convinced me that using vacuum infusion was the method that would most likely give me the best outcome when working by myself on a project as large as my camper body.
Thanks again guys…
Vinylester vacuum infusion is a process that involves reinforcement being laid into the mould dry (without any resin) and then enclosed in a specially configured stack of bagging materials (such as peel ply, infusion mesh and bagging film) before being subjected to vacuum pressure using a composites vacuum pump. Once all the air has been removed from the bag and the reinforcement has been fully compressed under this pressure, liquid vinylester resin (mixed with catalyst) is introduced to the reinforcement through a pipe which then infuses through the reinforcement under the vacuum pressure. Once the resin has fully infused through the reinforcement, the supply of resin is cut off (using a pipe clamp) and the resin is left to cure, still under vacuum pressure.
Prior to my trip to Queensland and working with the guys at Cure, my intent was to hand lay all the panels for my camper body, but now I am planning on “learning as I go” and to build all (or most) of the composite parts using this vacuum infusion process. Wish me luck…
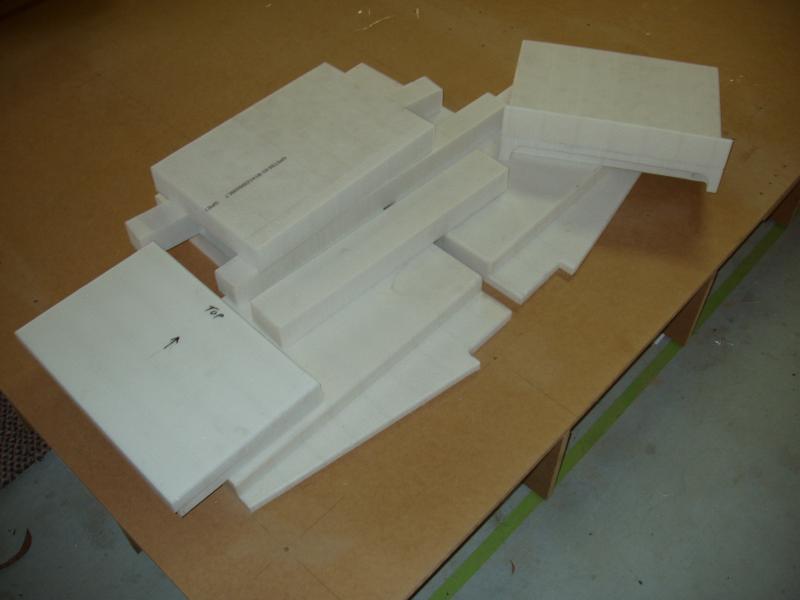
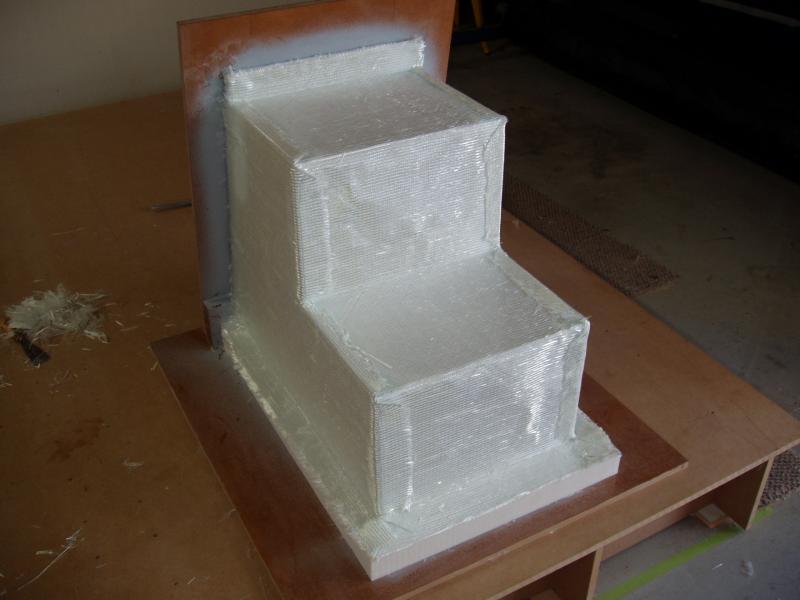
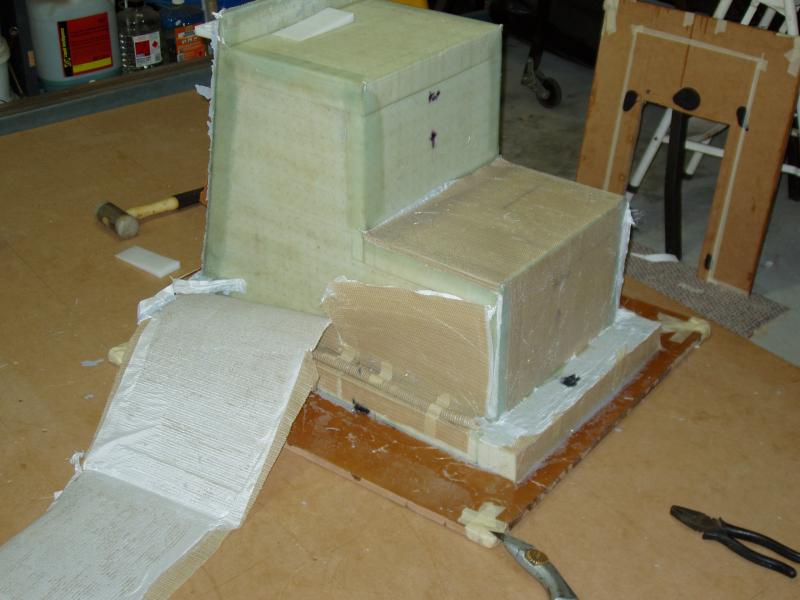
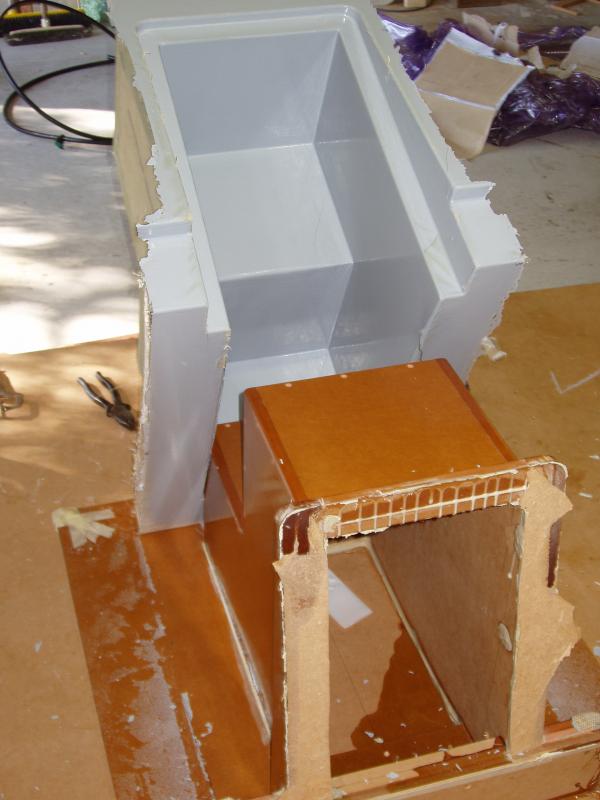
Below is some of what I learnt while doing my first vacuum resin infusion and the build processes I went through to create a step well that is similar in shape to what I will have in my camper. I chose the step well as my test because it is probably the most complicated individual mould shape in my camper design. The logic being… if I can build this part then the other moulds should be easier. Time will tell if that pans out.
I have to say, after doing this test I actually think vacuum infusions are easier than wet laying fibreglass, but maybe that’s just me.
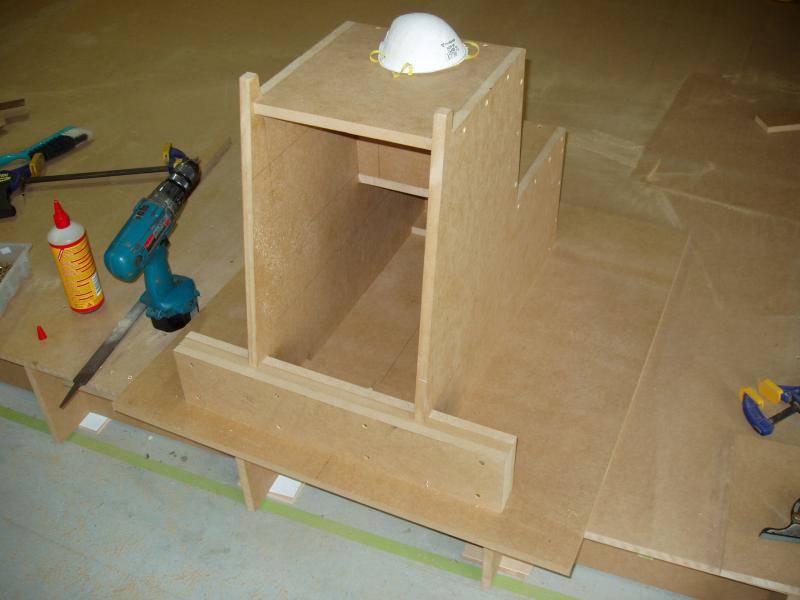

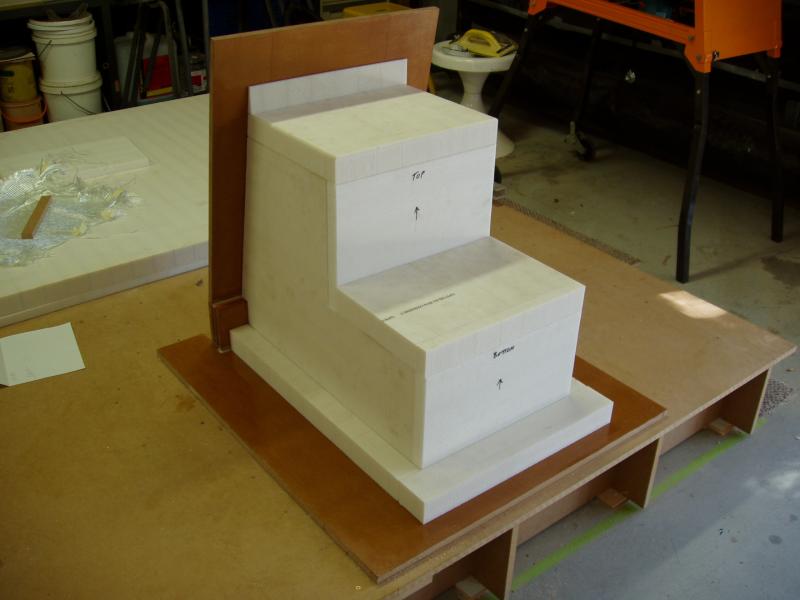
The biggest challenge when using MDF to make an infusion mould is ensuring that it is sealed, especially on the cut edges. Infusion moulds need to be airtight, or you will end up sucking air through the part during the infusion process, which can’t be allowed to happen. I did a poor job with the mould; more on that later.
Well… it leaked like a sieve! I decided to open up the back of the mould and applied some plasticine around all of the corners and joins, which I was sure would eliminate the leaks. A tip… don’t make assumptions!
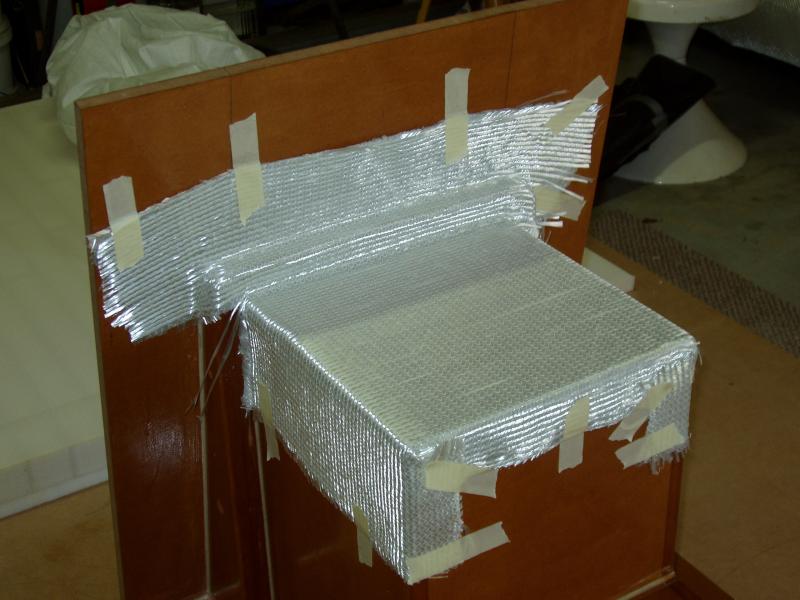
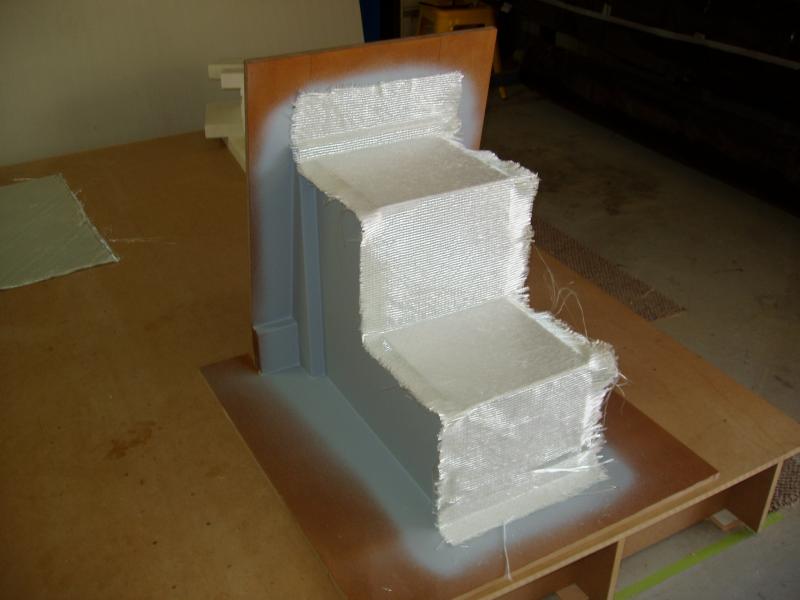
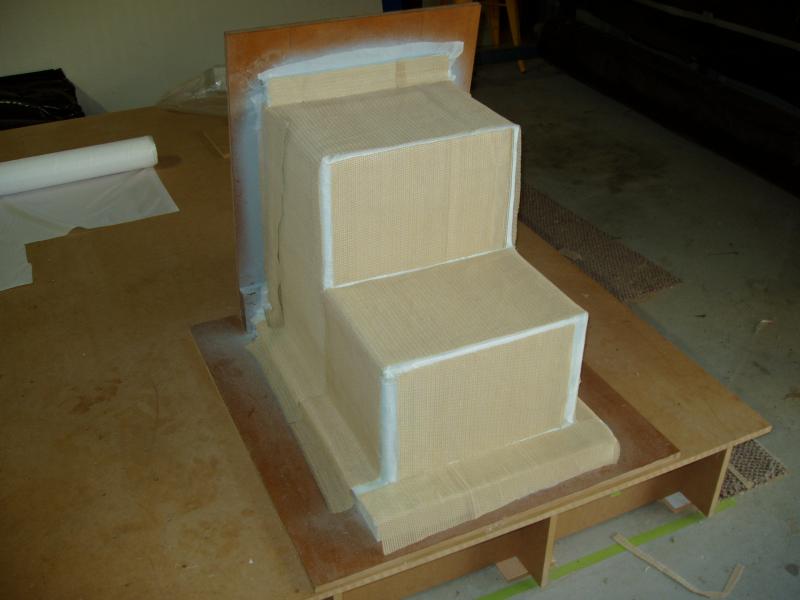
I also test fitted a piece of fibreglass, which I will be using, to see how it would wrap around the mould.
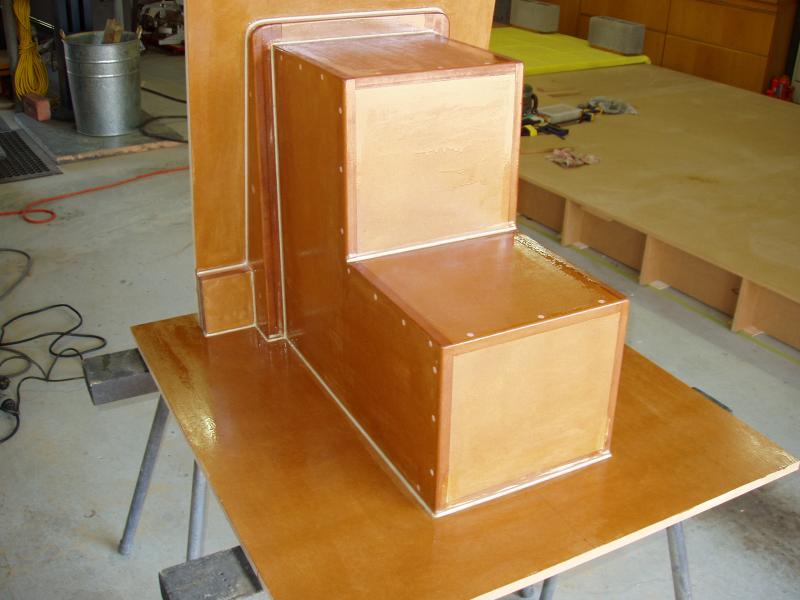
Before spraying the gelcoat, I applied 10 layers of wax to the mould. That may seem like a lot, but I know from past experience that more is definitely better than less when it comes to layers of wax on a mould.
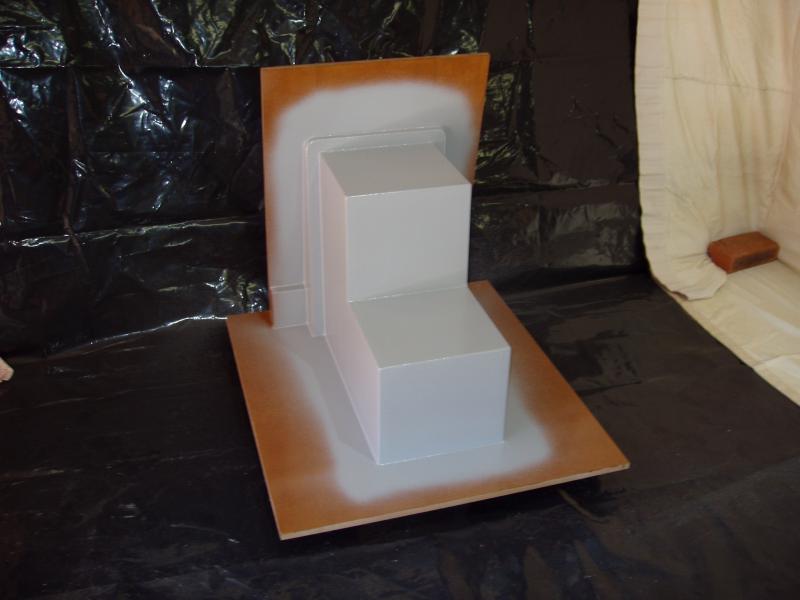
Normally I would also apply a coating of PVA release agent to the mould, but for this test I chose to rely solely on the carnauba wax. To be honest, I did not know how or if this would work, but I wanted to find out. What I can say is that I was very happily surprised at how well it turned out. Ya gotta love YouTube!


Only screwing the sections of the step mould together and not gluing them was a very poor design decision and one I ended up paying for.
Sometimes you focus is on future tasks, not current ones, so you hurry to get to that point and don’t do the things you know you should do.
The big take away tip here… Don’t cut corners on the important stuff. All joins must be glued and screwed and reinforced where necessary.
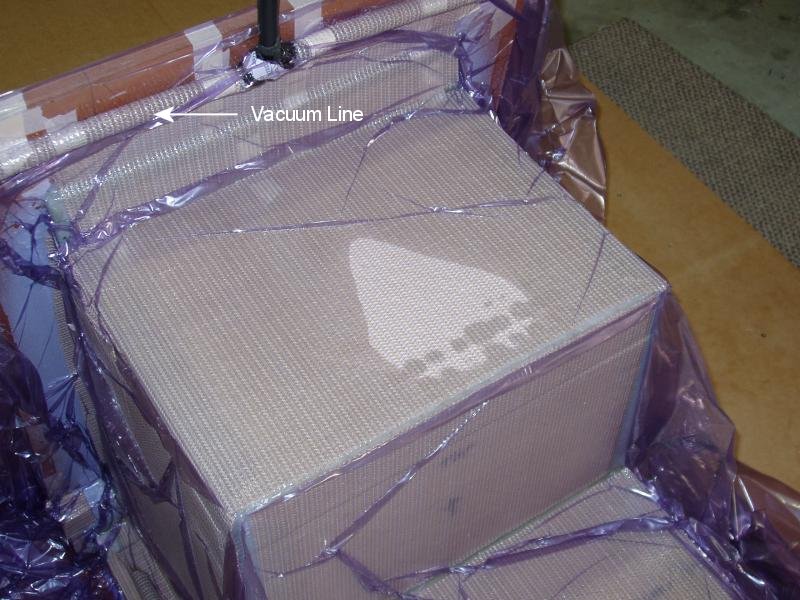
The plasticine I though would seal the mould from the inside didn’t, which I found out when I added the vacuum film and couldn’t get a vacuum greater than 15 in/Hg. My vacuum pumps have the ability to pull a vacuum of just over 27 in\Hg, which is pretty close to a “perfect vacuum” (29.92 in/Hg at sea level). I was advised not to begin an infusion if I could not attain a vacuum of at least 25 in/Hg on the mould and I definitely was not getting anything near that. Basically, a poor vacuum means you have leaks! You have to find and fix these before you start any infusion.
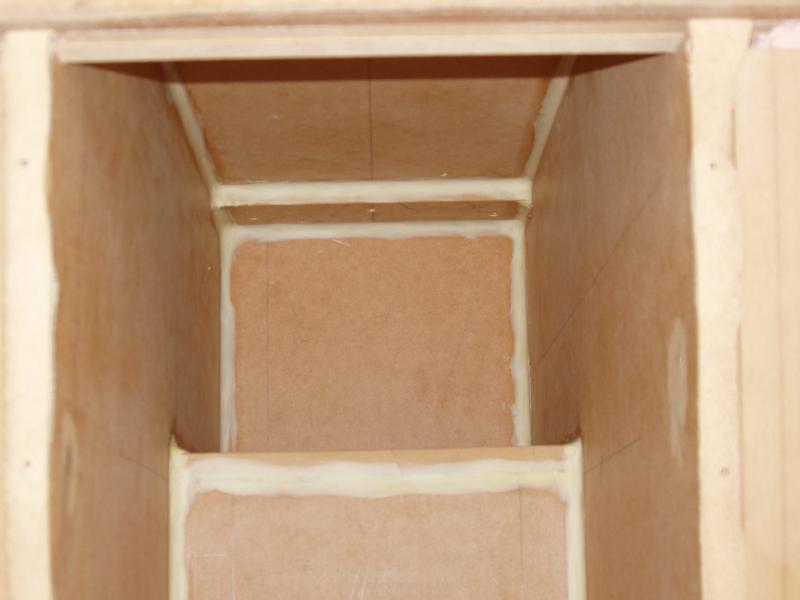
I could hear the leak, but could not isolate exactly where it was coming from. I figured that the hiss I was hearing was coming through the foam, not any of my pleats or other joins on the tacky tape. To fix this issue I would need to pull all of the material off the mould and hunt down exactly where the leak/s were coming from. Not a small job and one I really did not want to do.
Given that the primary purpose of this test infusion was to see if I could build a part with odd angles and shapes, I did not want to waste more time trying to seal a mould that would only be used once, so I didn’t. I ripped off the vacuum film and tacky tape and took a different path.
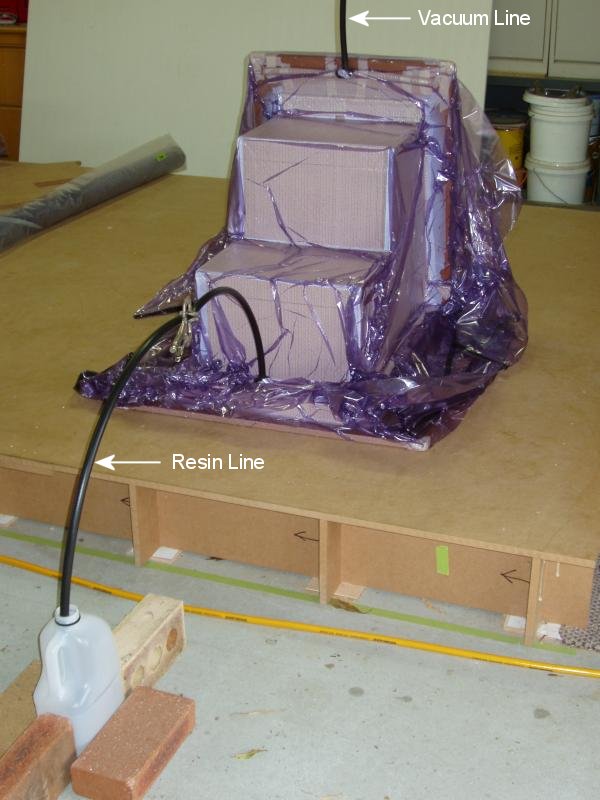

One step that I have left out is that there needs to be a way to get the resin into the part and a way to make the resin flow through the part.
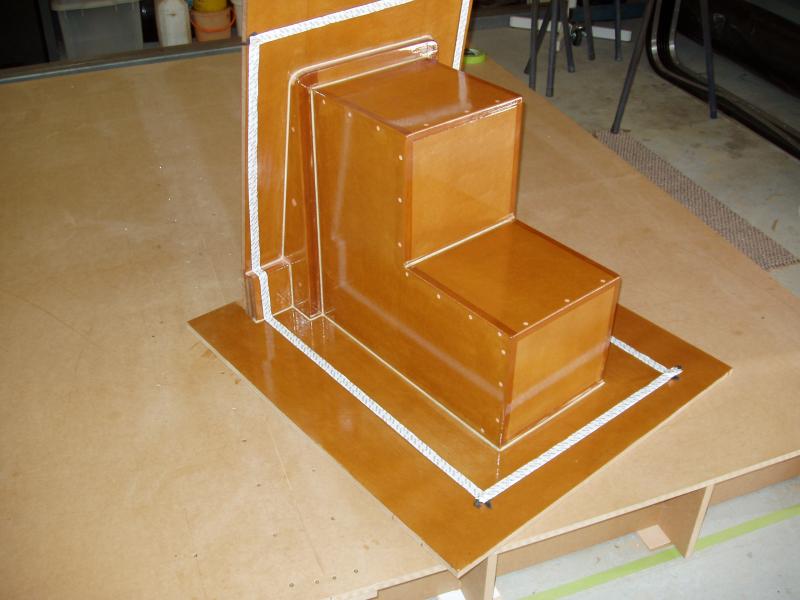
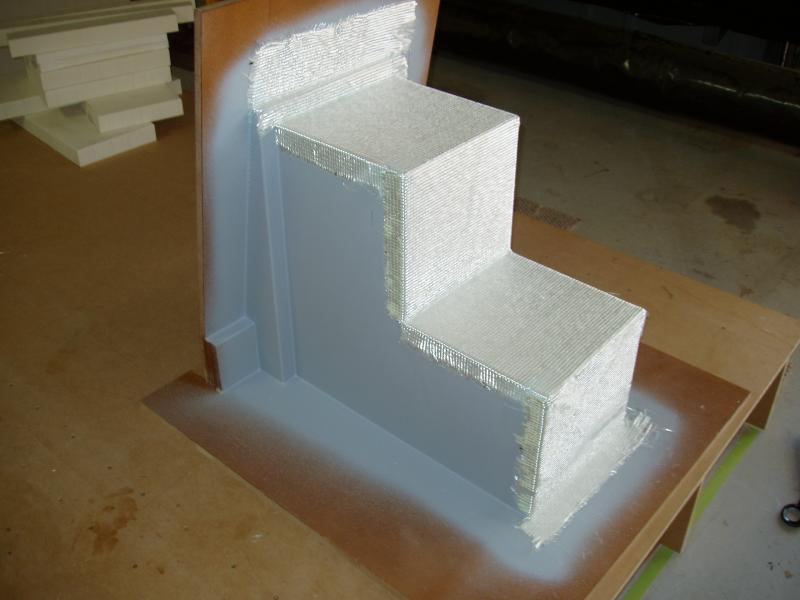
This is done by including a resin line (in) at the bottom of the mould and a vacuum line (out) at the top of the mould. For both the resin and vacuum lines I used 16mm infusion spiral, which is virtually identical to spiral cable wrap, but is made from PTFE. Into the spiral wrap is fitted a simple irrigation Tee piece, to which the pipes are fitted. The pipe is just plain old black, 1/2” irrigation poly pipe, which is very cheap and easy to source. Tacky tape is used around the Tee to give a vacuum tight seal. The perforations in the core material allow the resin to flow through it, allowing you to infuse both sides of the core material at the same time. During the infusion each perforation fills with resin, which gives you hundreds of little pillars, each of which adds to the overall compressive strength of the material.
With the mould now under full vacuum it was time to actually do the infusion. I worked out the total area of the mould so I could calculate the amount of resin that would be required. That was all good in theory, but reality was a whole other story. Instead of using the 1 litre I figured I’d need, I ended up using 4 litres! There are obviously factors that I did not take into consideration, so I will have to devise a much better formula for future infusions (and I will have to order more resin too).
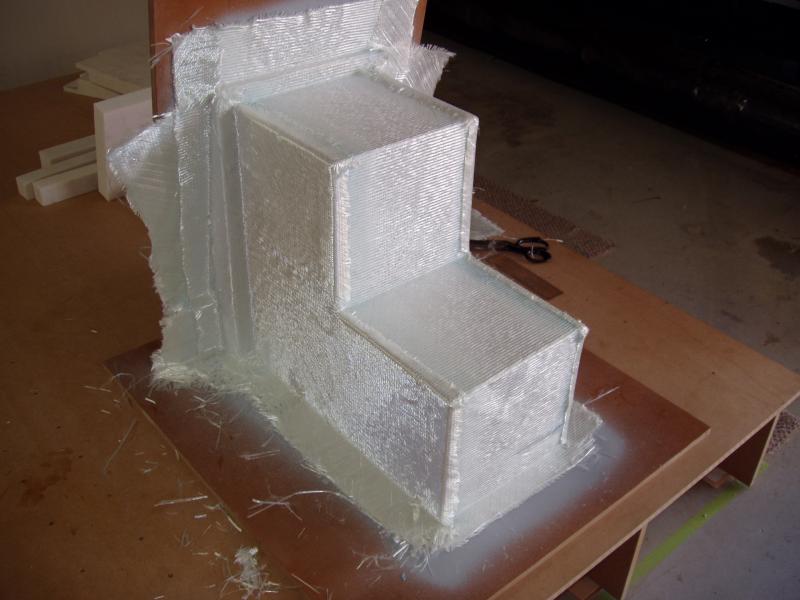
Other than having to quickly mix up some more resin/catalyst, the infusion went flawlessly. When I opened the resin line, resin flowed nicely around the entire mould and slowly worked its way to the top. From start to finish, the infusion took about 20 minutes. The vacuum pump was left running for an additional 8 hours and then turned off and the part was left to cure overnight on the mould.
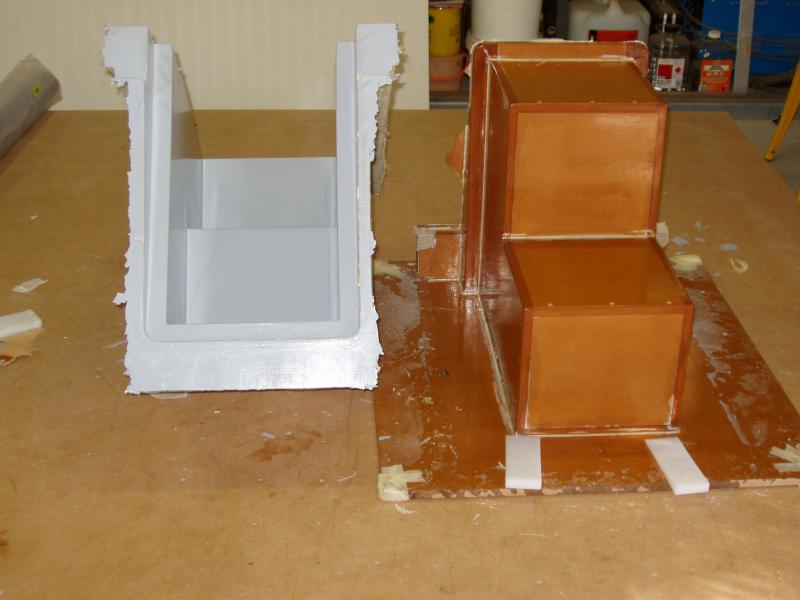
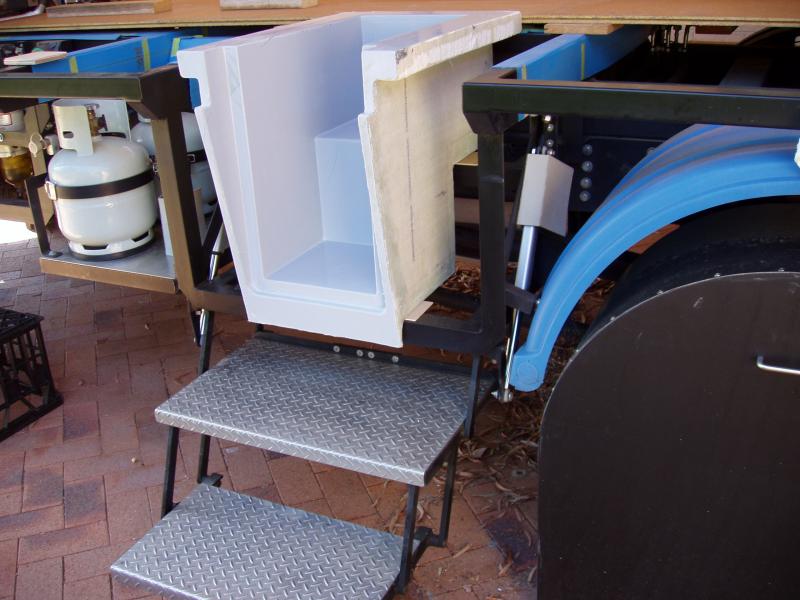
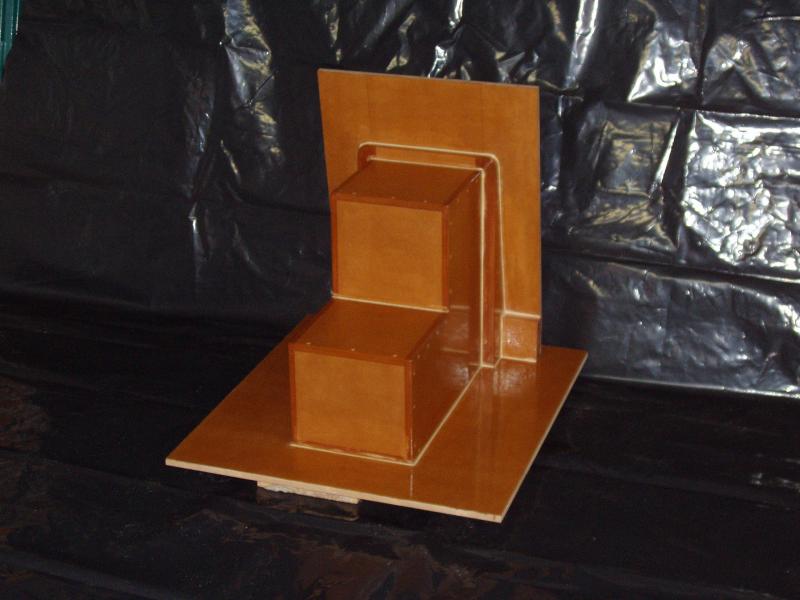
With the part off the mould I used a grinder to do a quick clean up of the edges and then placed the part onto the truck’s subframe. It fitted well and was very solid. Despite the amount of resin that I used, I was very happy when I weighed the part, as it was less than 6.5 Kg.
All in all, I think that this test was a resounding success. There are some things that I will have to pay more attention to when I build the real moulds, like ensuring that the mould is vacuum tight, but there were absolutely no show stoppers during any of this test.
I see no reason to do more tests before making the floor and step mould, so this work will begin very shortly. I still have to do some final CAD design, but when that has been completed I will be getting stuck into the mould manufacture and then do the infusion.
To infuse or not to infuse, that is the question…
At this point I should probably add that there are some definite disadvantages to doing vacuum resin infusions, the primary ones being the amount of consumables you use and the extra equipment that is required, all of which add significantly to the cost of manufacturing parts.
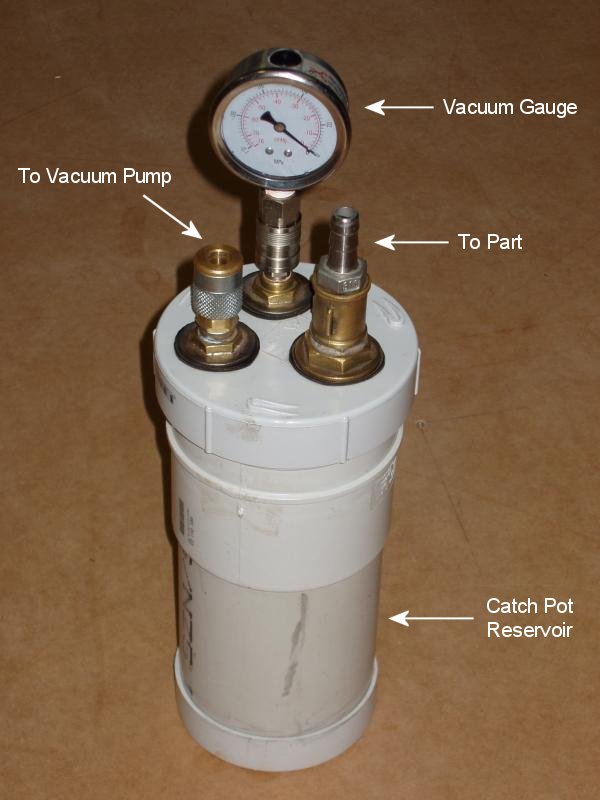
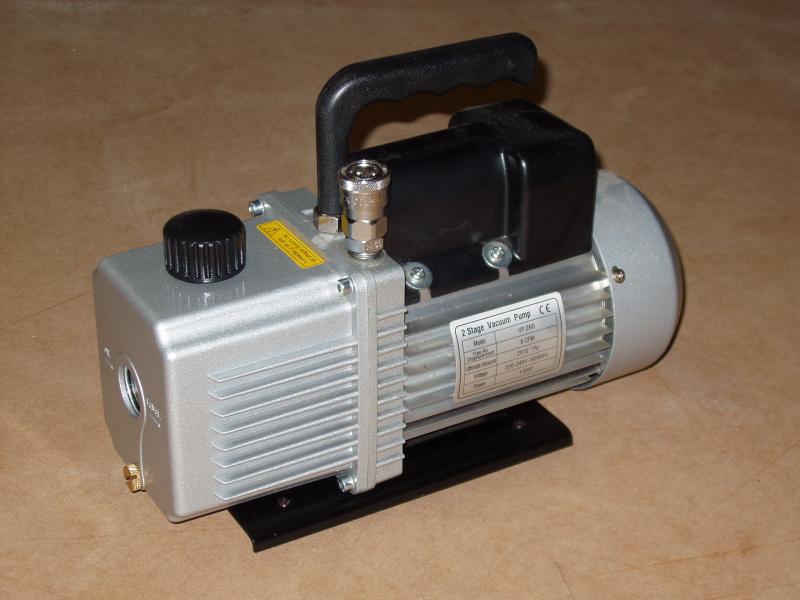
You need a vacuum pump capable of attaining a deep vacuum and probably a spare, should the primary pump fail in the middle of an infusion. Commercial vacuum pumps are very expensive, but as far as I am concerned, you can get away with using a small, 2 stage refrigeration vacuum pump (used for gassing refrigeration equipment) if you don’t plan on starting your own composites business. My pumps cost about $250 each. You will also need things like a resin catch pot, release film, flow mat, vacuum film, tacky tape, infusion spiral, vacuum hoses and the list goes on. Lots of this material is simply thrown away after it has been used, as it is not reusable. That could be seen as a bit of a negative for some people.
So, I hear you asking… why would you choose to use vacuum infusion over hand laying (wet laying) the fibreglass?
Well, a resin infused part will probably be lighter and stronger than a part you have hand laid, as it will have a better resin to glass ratio.
As much as that is a good thing, it was not what made me go down this path. When I went to Cure Composites there was a guy there in the beginning stages of laying up a 2.5 metre x 14 metre flat panel. That’s a bloody big panel, and he was doing it all by himself (until I turned up).
One of my greatest concerns has always been how I was going to build a moulded expedition sized camper body all by myself. When I saw that a panel of this size could be made easily by one person, I was sold. Sure, there are some additional costs to doing vacuum infusions, but for me it meant that using this process I stood a much better chance of success with my project. If you had a group of people to help you, all with composite skills, then the situation would be very different, but I don’t. I am doing this entire build by myself and there is no denying that this poses significant challenges. Composite materials are not cheap, and to be honest, I cannot afford (financially) for this to go wrong.
Another major advantage with using vacuum infusion is that you lay everything up dry and only introduce resin when you are 100% happy with your setup. There are no real pressures with resin catalyzation times and having to work fast enough to get all of the glass laid and any air bubbles removed before the resin starts “going off”. Also, when doing a resin infusion there is virtually no smell, as the pump can be located outside, and there is minimal mess. To top that… a big plus for me is that there is little to no cleaning up of tools and equipment when you are done. If that’s not a positive, I don’t know what is. I hate cleaning up!
I am not saying that vacuum resin infusion is the best solution for everyone, because it probably isn’t, but for me I believe that it is.