 Click any image to enlarge
My intent was always to have a winch fitted to the truck, so when I ordered the bullbar, naturally I specified one that was winch capable.
Unfortunately, the majority of 4WD outlets normally only supply winches up to 12,000lbs, which are not really suitable for a 6 tonne truck.
I needed something bigger!
If I had a larger budget for this project I definitely would have considered getting a hydraulic winch. But obviously, in order to have a hydraulic winch it would also have been necessary to have a hydraulic system to drive it. That would have involved a Power Take Off unit (PTO), a hydraulic pump and reservoir as well as the winch itself. That setup would have cost me $8000, or more… Ouch!
Given that my primary reason for having a winch is as an insurance policy, an electric winch should meet that requirement.
The challenge now was to find a winch that was capable, but one that would not cost me an arm and a leg.
Warn, which is arguably one of the the most well known winch manufacturers, make a heavyweight series of winches that includes the M15000 and the 16.5ti Thermometric models. Either of these two winches would have been suitable for my truck, but starting at more than $3000 for the M15000, they are obviously priced at the upper end of the electric winch market.
The Warn winches are definitely cheaper than a complete hydraulic winch setup, but they are still a bit too expensive for my budget.
Not many other winch manufacturers build electric winches with a capacity above 12,000lbs, but one company that does is Runva, who do make 15,000lbs and 17,500lbs models.
I first heard about Runva winches from All Terrain Warriors (ATW), which is the company I bought my truck through. After carrying out destructive testing of numerous different winch brands, including Warn, ATW have chosen to use Runva winches in many of their truck builds.
Their conclusion was that the Runva winch is probably the best of the Chinese made winches currently available on the market and they were also decent value for money. The results of ATW’s testing, along with my own research, gave me the confidence to buy a Chinese made winch.
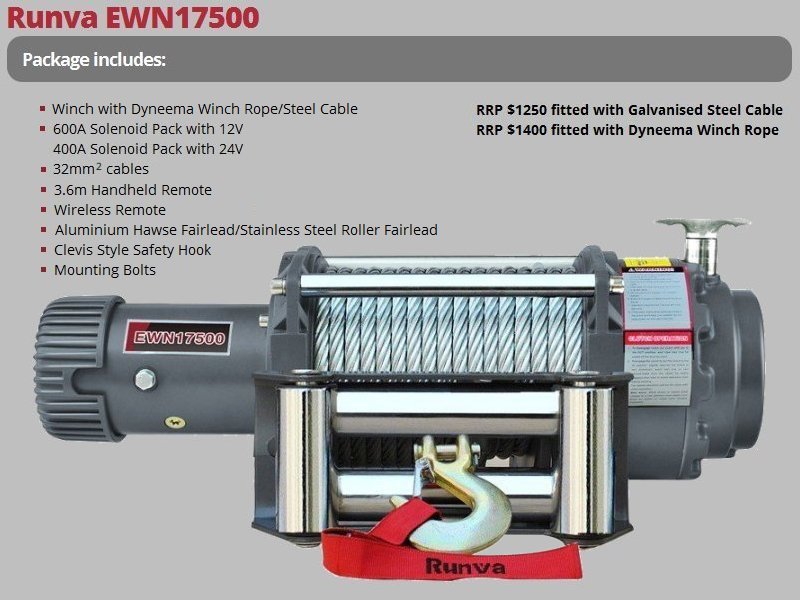
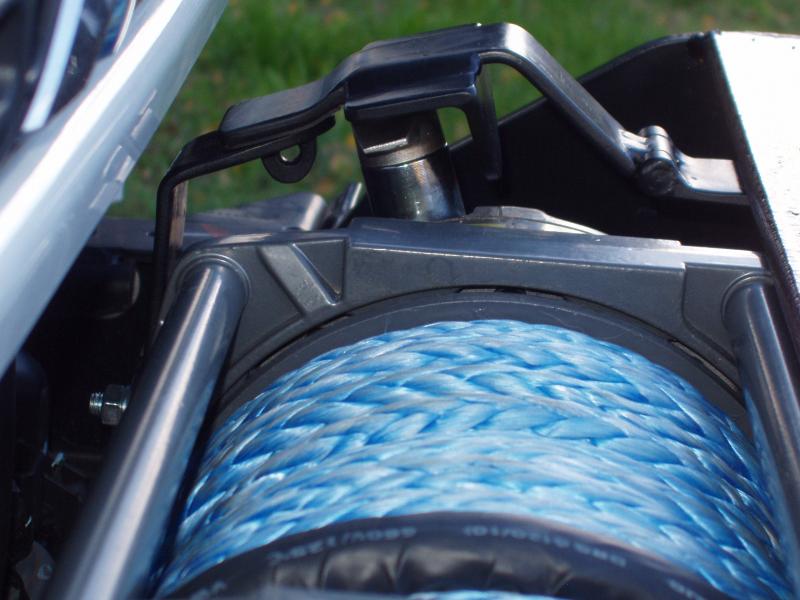
The winch I bought is the Runva EWN17500 (8 Tonne), which is probably overkill, but I got it for a very good price. I also elected to get the winch with synthetic rope, opposed to steel wire rope. My first preference would have been plasma rope, but the Runva came with Dyneema rope, which is very similar. Synthetic rope has its pros and cons. On the plus side, it is considerably lighter and stronger than wire rope and, should it break when in use, it is far less likely to cause any injury or damage. Steel wire rope can be dangerous and it is normally more difficult to handle. Some of the problems with synthetic rope are that it can be affected by exposure to the sun, it is more prone to damage and it requires more maintenance (it needs to be washed if it gets dirty). The general opinion in the 4WD arena however is that the advantages of synthetic rope outweigh any negatives it may have, and it is definitely easier to use than wire rope.
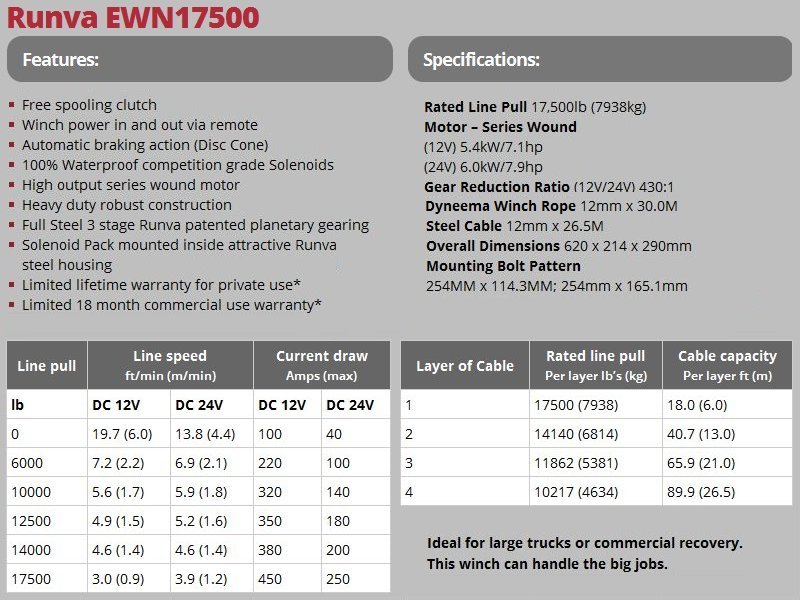
When the EWN17500 winch is fitted with 30 metres of 12mm Dyneema rope, the weight comes in at just under 43Kg. That’s definitely not light, but this is more than 20Kg lighter than when fitted with steel wire rope.
The EWN17500, as delivered, was setup for horizontal installation, but that was not going to work for me. The winch needs to be mounted vertically on my truck, so it was necessary to disassemble and reconfigure the winch before it could be installed. First, the motor was removed from the housing so it could be rotated 90 degrees. This was not mandatory, but it does put the cable lugs in an optimal position. It was also necessary to rotate the gearbox on the housing, so that the winch’s clutch handle would be at the top. This involved removing the housing from the winch drum in order to access the gearbox securing bolts, which are located on the inside of the housing. After the bolts were removed, the gearbox was rotated into the desired position. All of the bolts were then reinstalled and the winch reassembled.
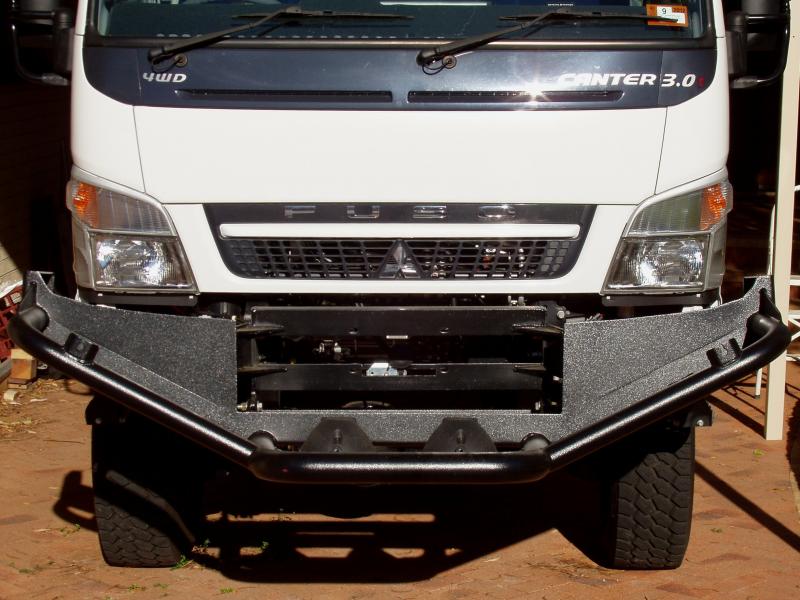
Before installing the winch I needed to do a bit of preparatory work. The first thing was to remove the bullbar so that it was easier to work on the winch mount. The mount has four elongated holes for securing the winch, but the EWN17500 has eight mounting holes. I drilled an additional four holes in the mount then, using a large round file, I elongated the holes to allow for positional adjustment of the winch.
I felt that it was prudent to verify that the winch was fully functional prior to fitting it so I connected up all of the cabling and, using a spare battery I had, confirmed that everything worked as it should.
With the winch’s functionality confirmed, it was time to install the sucker.
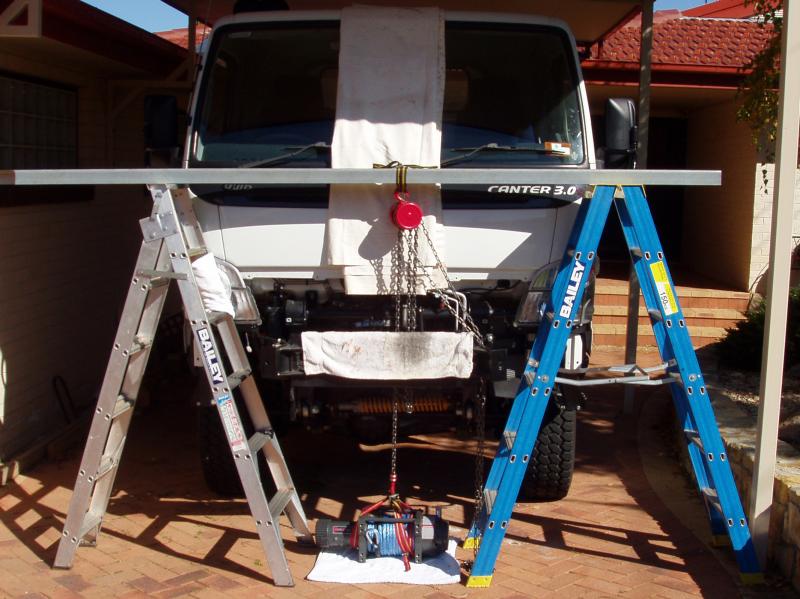
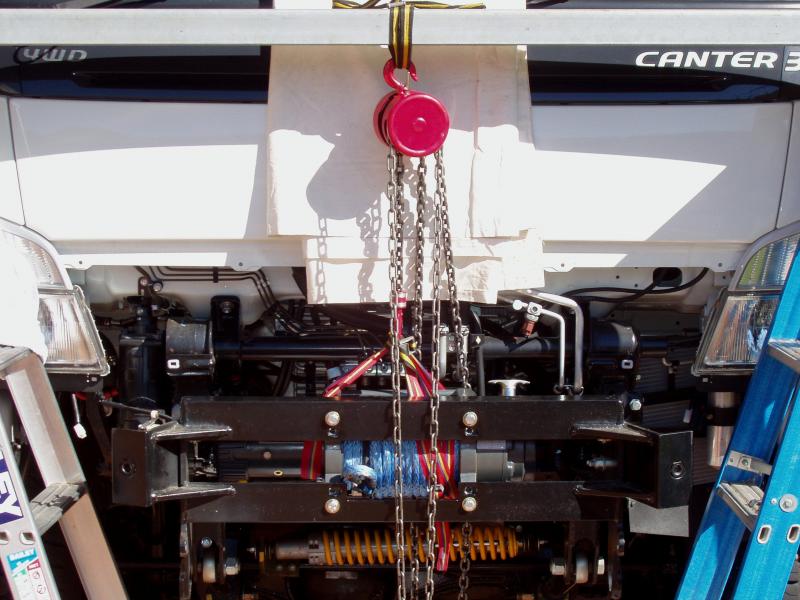
Given the weight of the winch, it was not possible to simply lift it into position, so I rigged up a makeshift gantry using two ladders and a length of 125mm C channel. Using a webbing strap I secured a block and tackle directly above the centre of the winch mount. Another webbing strap was used to provide a lifting harness on the winch. With everything connected and in place, I slowly raised the winch into position and then temporarily secured it with four bolts.

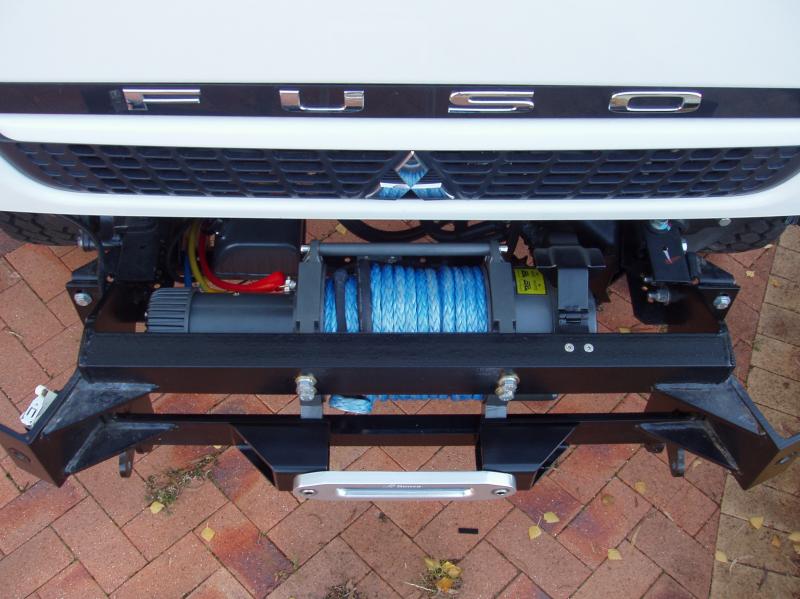
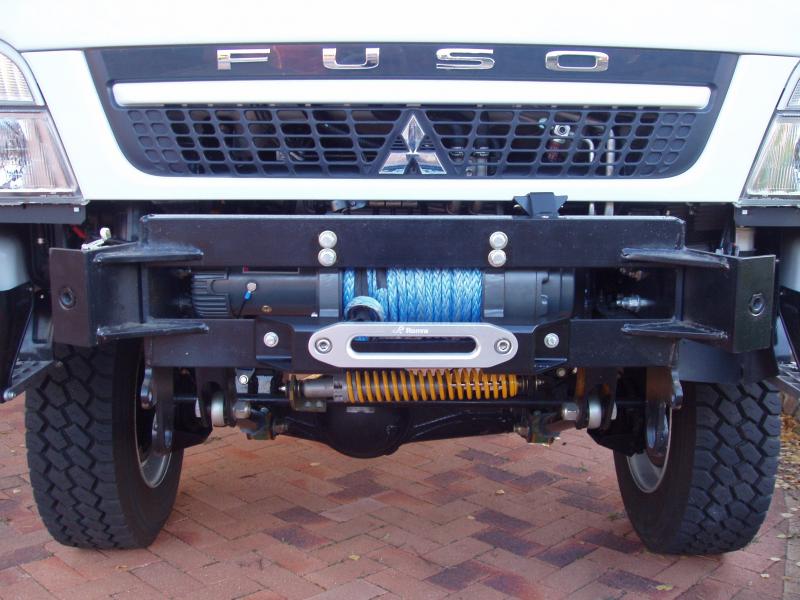
The bullbar and winch mount are designed for a roller fairlead, so some manufacturing work was required in order to fit a hawse fairlead for the synthetic rope.
To mount the hawse fairlead I did a bit of over-engineering, electing to use 75mm RHS with a 6mm section. Potentially, there can be quite a bit of compressive load on the fairlead if winching at an angle, so I employed the logic of “bigger is better”. The fairlead mounts are secured to the winch mount using the bottom two winch securing bolts on each side and an 8mm bolt is used to secure each end of the fairlead mount.
12mm synthetic rope is definitely not cheap if you have to replace it, so I wanted to include something to secure the winch as much as possible and prevent anyone from steeling the rope by disengaging the clutch and simply spooling it off.
The system I came up with is quite simple; it’s basically a hasp and staple type of hinged bracket that goes over the top of the clutch handle, preventing the handle from being raised.
When the latch is locked, it is not possible to lift the clutch handle high enough to disengage the clutch.

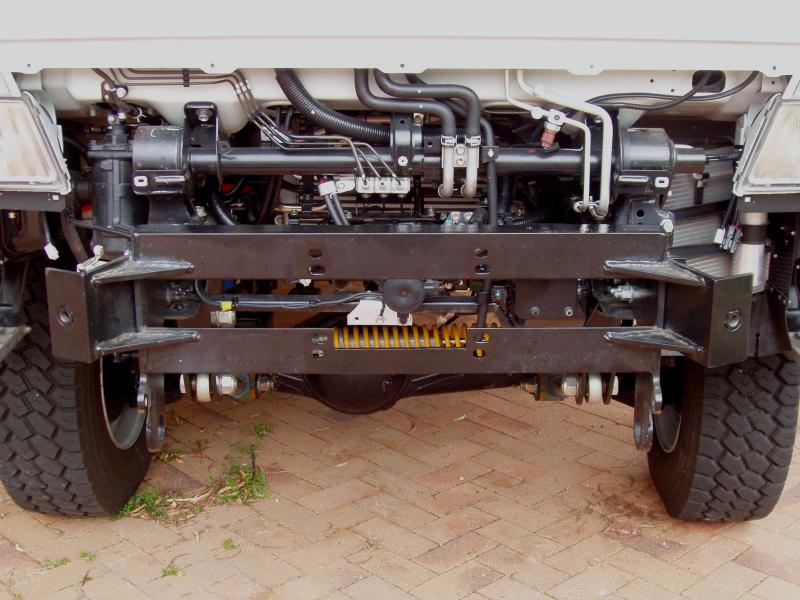
The control box, that contains the solenoids and cable connections, normally mounts directly to the winch housing. I wanted to make my setup a little cleaner, so I have chosen to mount it remotely. The control box was installed under the cab, directly behind the winch motor, where it is out of sight and out of the way. The manual control socket is still easily accessible.
Prior to fitting the solenoid box on the truck I also did a bit of neatening up of the wiring inside it. This involved covering all of the connectors with glue lined heatshrink, which adds strength to the join and improves water resistance.
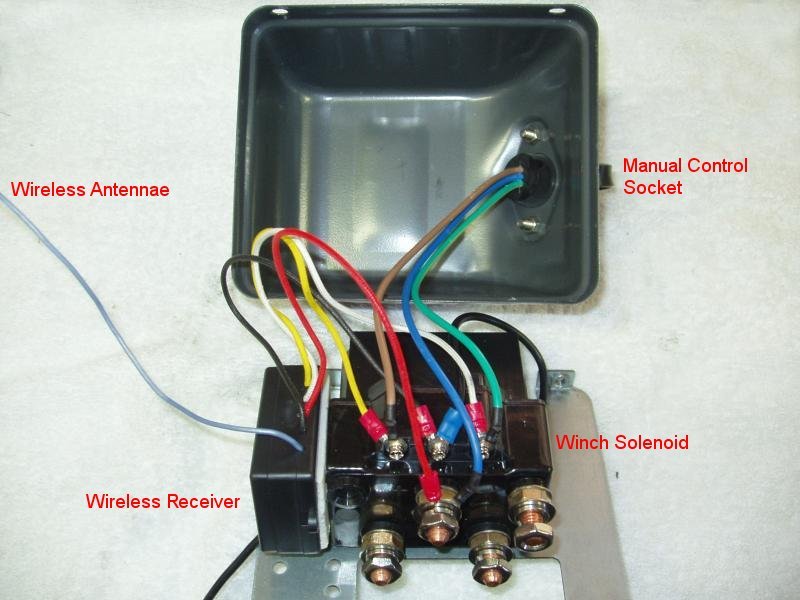

I have also connected wires directly to the terminal posts inside the control box (the same terminals used by the manual controller) so that a three position momentary rocker switch can be mounted on the dash inside the cab to control the winch. I only ran wires off the the two solenoid switching terminals, electing to run the power wire from the fuse panel inside the truck’s cab, rather than from the main power wire in the solenoid box. The winch came with a wireless controller too, but I have chosen to disable this feature.
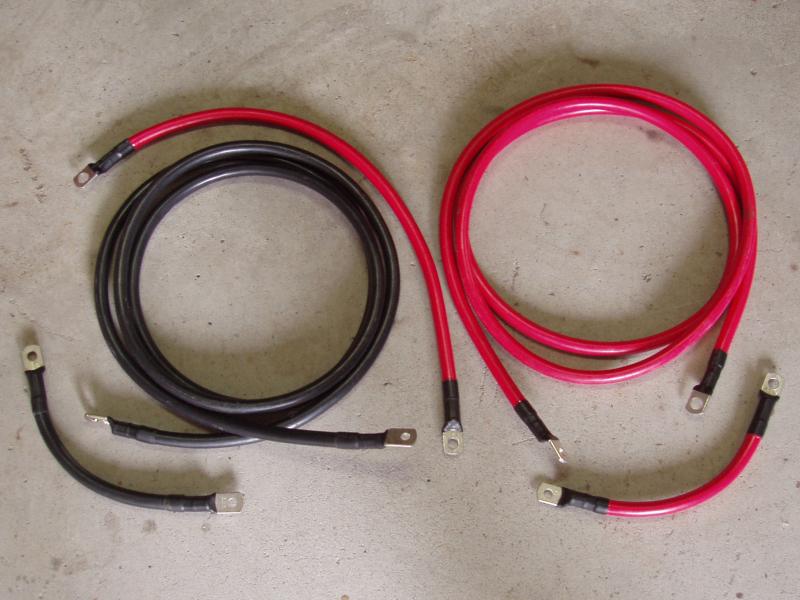
The winch was supplied with 32.15 mm² battery cables (AWG 2) which have a power rating of approximately 230 amps. In my opinion this cable is undersized, considering that the specifications for this winch state that it is capable of drawing a maximum of 450 amps under full load.
As I have mentioned, the EWN17500 is overkill for my truck, but one advantage of this is that when the winch is pulling less than 14,000lbs (6.3 Tonnes) it should only draw a maximum of 380 amps. Given that I had to replace the cables anyway (they were too short for my setup), I have upgraded the power rating by using 64.29 mm² cable (AWG OO) between the winch and the batteries. This cable is rated at 370 amps.
Voltage drop can be very detrimental, so your electrical design should try and negate it as much as possible. When it comes to electrical cabling, bigger is normally better. Unfortunately, copper is not cheap these days, but I would always recommend using larger cable than specified by a manufacturer. I can pretty much guarantee that you will have far less problems if you take this approach with your wiring.
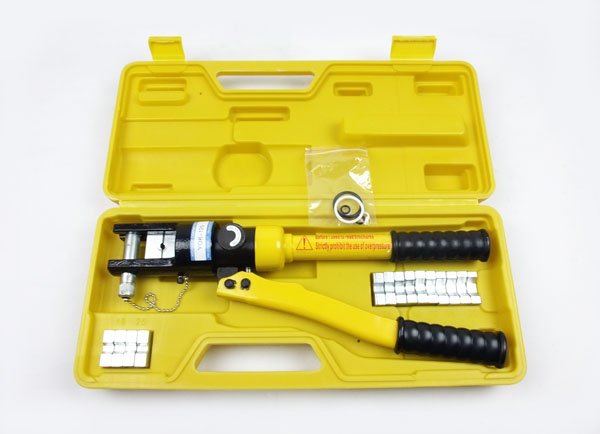
In order to fit cable lugs to the AWG OO cable, a specialised crimping tool is required. I could have used a friend’s crimping tool but decided that with the amount of cabling I still have to do in this project, buying my own was justifiable.
The 12 tonne hydraulic crimping tool I purchased only cost $75.00 (including freight) and is capable of crimping 10mm² to 120mm² cable lugs, which covers all of the cable sizes I am likely to use in this project.
This tool is very easy to use and it does an excellent job.
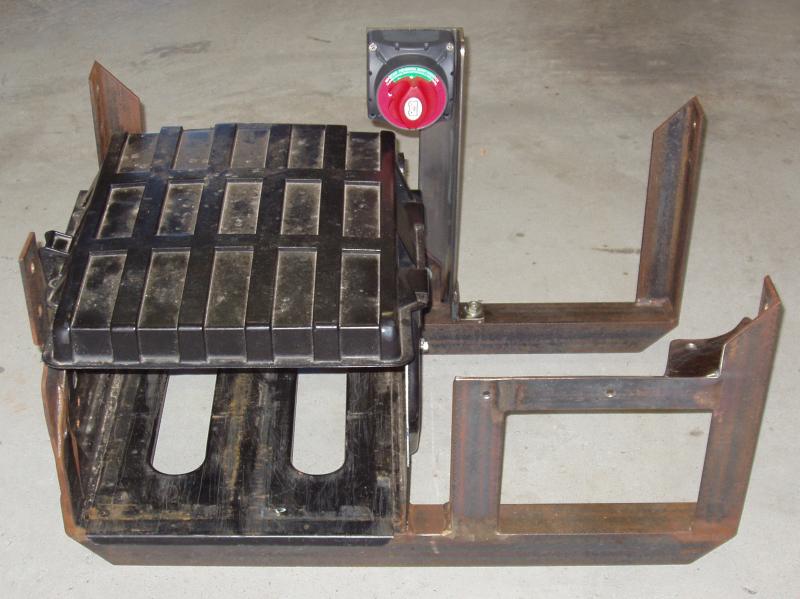
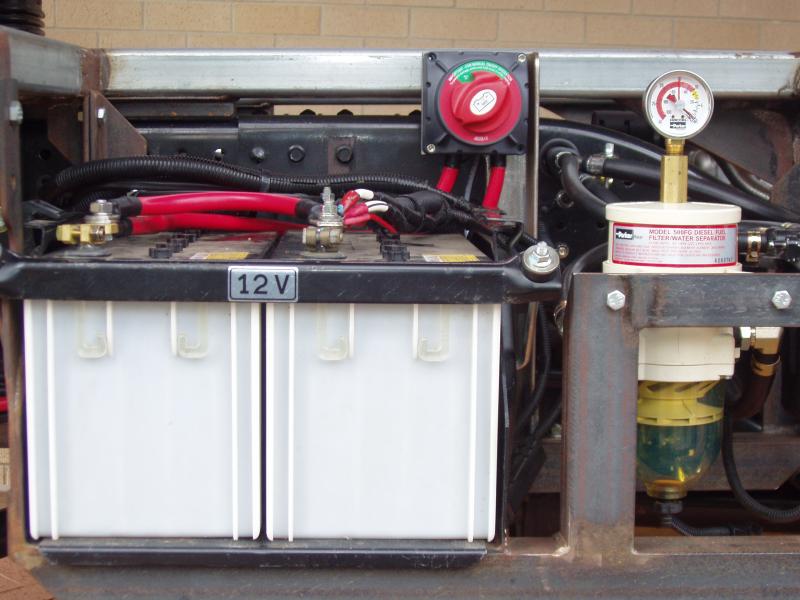
By default, there is 12 volts at the winch solenoid at all times. I consider this to be a potential issue, so my installation also includes a winch isolator. The isolator allows for the winch to be electrically disconnected from the batteries when not required.
The isolator I chose to use is the BEP 720-MDO, which is a marine switch rated at 500 amps continuous.
One of the reasons I chose this particular isolator is that it has the ability to be operated remotely, via a switch on the dash, but it also has a manual override as a safety option. This is a very cool switch.
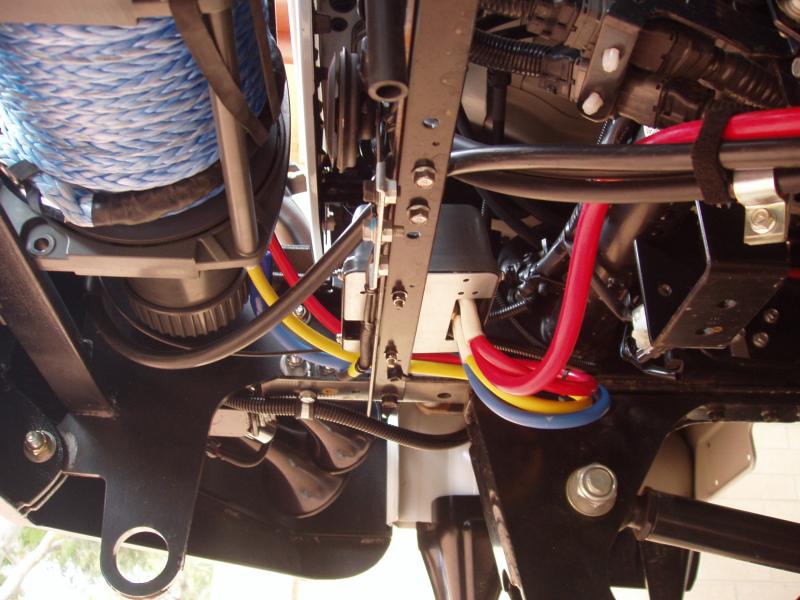
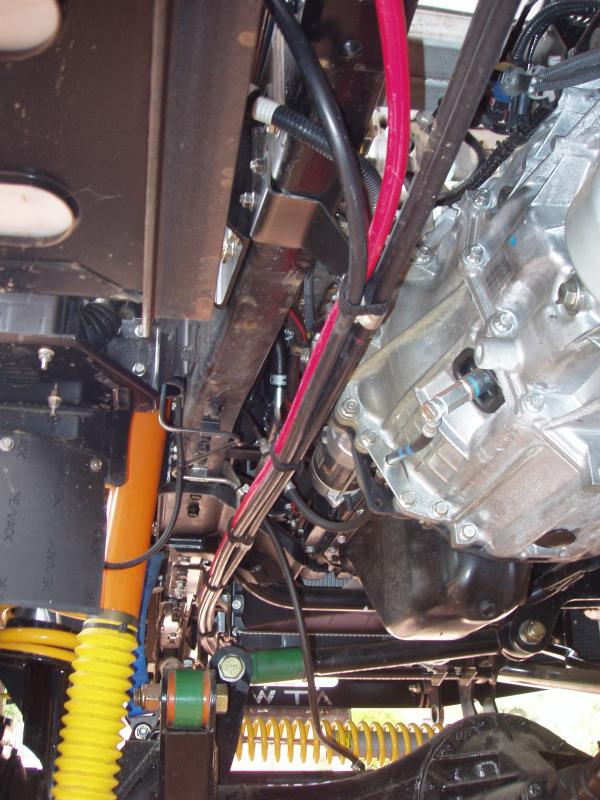
As it turns out, the most direct route from the winch to the truck’s batteries was along the same path as the transfer case cables. I was going to run the winch power cables within the chassis rails but decided that attaching them to the transfer case cables was easier and would use less cable, so that’s what I did.
The distance between the winch and the truck’s batteries is approximately 3 metres. The positive cable is a little longer, as it is routed through the isolator switch before being connected to the battery.
Installing the winch cost me just under $2000.
That price includes the 17,500lbs winch with synthetic rope, the AWG OO cable and connectors as well as the BEP 720-MDO isolator switch.
It does not include the cost of the winch capable bullbar; that was an additional $2450.
As useful as a winch may be, it should only be one part of your recovery tool kit. In a future article I will cover off what I believe to be the absolute minimum of recovery gear that should be carried in your vehicle if you intend to venture off the beaten track.
Something else to think about…
There is an urban myth circulating around the internet which describes people’s vehicles being crushed by the cables of their own winches.
This myth involves a nefarious person, or persons, spooling off the winch cable, wrapping it over the vehicle then bridging the terminals in the winch controller and powering up the winch. As the winch winds the cable in, it ultimately causes massive damage to the vehicle.
I have never seen any documented photographic evidence of this ever happening, but I have to tell you, it is totally plausible!
Most winch installations have a direct power connection from the battery to the winch solenoid. Because of this, bridging a few of the pins in the controller will normally engage the solenoid and power up the winch. Yes, it really is that simple!
My advice… install an isolator in a location that is not easily accessible and turn the power on for the winch only when you need it.
Surely it is better to be safe than sorry. 😀